Below you'll find part five of John Marks' six-part series describing one method for digitizing LPs. John, he of the blog site The Tannhauser Gate, gives our readers a cost-effective and reasonably simple method for transferring your albums to PCM files for archiving and playback functions. As he points out in his footnote, this method does not encompass the use of DSD (Single, Double, or Quad rate DSD) as a format. For that, more sophisticated equipment is required (e.g., a Playback Designs Pinot A/D converter). Note also that I would be one who would be counted among those whom he designates as being subject to "the enthusiasms of a minority of audiophiles." Ahem!
Nonetheless, John's Apple Mac-base approach is straightforward and not unduly expensive, and is thus approachable by a number of audiophiles who are interested in exploring the world of digitizing analog sources. I heartily salute John's service to the high-end audio community.
Dr. David W. Robinson, Ye Olde Editor
This is the fifth (and the penultimate) installment in my series about choosing Pareto-Optimal equipment to make archival digital copies of vinyl LP (long-playing) phonograph records. The first part (an overview) is HERE. Part 2 (Rega's Planar 3 turntable package) is here. Part 3 (Graham Slee's Revelation M phono stage) is HERE. Part 4 (a USB computer interface to handle analog-to-digital conversion) is HERE. This installment covers software to make and edit a digital transfer of an analog LP.
In my immediately-previous installment, I tried to drive home the point that the kind of "computer audio interface" box that you can find at your local guitar-and-keyboards store is likely to have features you don't need, while lacking features that you do need. This installment sings the same tune, but with different words.
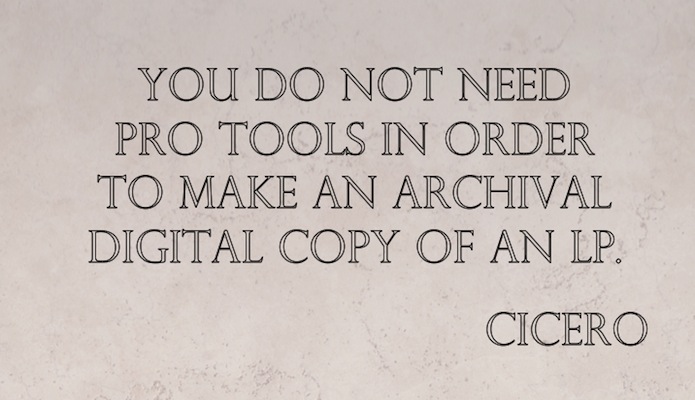
You do not need the Pro Tools software suite in order to make an archival-quality digital transfer of an LP (or any other legacy sound-media format). (Neither do you need a lightning-fast tower computer with buckets of RAM.) Justifications are below.
I think using Pro Tools might even be counter-productive when you are digitizing LPs—there is so much more to go wrong. You do not need 36 inputs or 128 tracks or 60 plug-ins. You do not need more than two tracks. You do not need software emulation of a classic vacuum-tube electric-guitar amp. You do not need to be able to apply the reverberation signature of a Gothic Cathedral…. All you need is a sound-editing software solution that is simple, intuitive, and as goof-proof as possible.
Pro Tools is software meant to record music in modern studios where creating performances from individual elements (which means that sometimes the musicians have not met each other, let alone played in the same room) is the rule, and recording everything live and all at once is the exception. To keep control of all the elements and the post-production effects applied to each one, you end up with a work surface that looks like this:
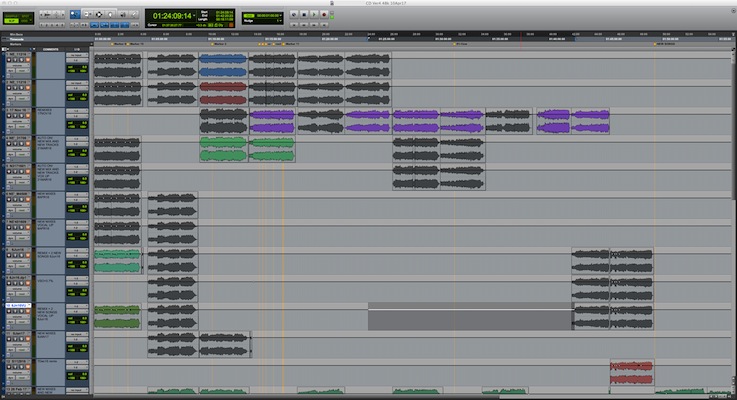
Workstation screenshot courtesy of Bob Ludwig, Gateway Mastering.
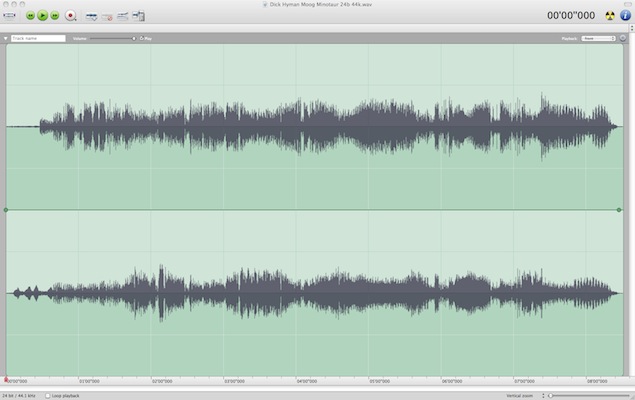
Whereas an LP digitization made using Amadeus Pro 2 looks like this:
This point is so important that I have carved it in stone for you (see the first image, above). I have even spuriously attributed it to a great Roman orator. (But I could have just as easily spuriously attributed it to a great Roman poet–perhaps Horace, for example. NON SUM QUALIS ERAM BONAE SUB REGNO CYNARAE, and all that… .)
Where was I? Oh–Hairersoft's Amadeus Pro 2 editing and mastering software. It's just the ticket. It's all you need, and a screaming bargain as well. Amadeus Pro 2 costs $59.99, but there is a 25% educational discount for faculty and students. Better still, you can download a fully-functional version for a 15-day free trial. (Amadeus Pro 2 is a Macintosh-only program. If you need a Windows program, Sony's Sound Forge Audio Studio 10.1 is a good choice, and it too costs under 60 dollars.) Among the many virtues of Amadeus Pro 2 is that in order to use it, you need not be running iTunes or even have an active internet connection up. Amadeus Pro is editing and mastering software; it is not going to try to take over adding LP rips to your iTunes library.
Buying software to my view is a bit like buying a purebred dog—you have to think about what the dog was bred to do. As a general rule, perhaps you should not buy a Dalmatian as a lapdog. Similarly, if a software suite was designed to be used by people who want to digitize their LP collection directly into their iTunes library, perhaps the software is going to have a mind of its own that is working at cross-purposes to yours.
In parallel with my nay-saying Pro Tools, I offer my opinion that you do not need the trash-can form-factor desktop Macintosh Pro to digitize an LP. If you are developing a multi-user online game, perhaps you need to spend that kind of money. But a Mac Mini (or a laptop) should do fine. Assuming that your library is on a network or an external drive, storage space should not be an issue, and running a basic editing program (as distinct from music-production software) does not require great processing speed or huge RAM capacity.
In order to digitize an LP using all this stuff, here's what you do (this example assumes use of an Apple iMac).
The analog audio output of the Rega Planar 3 turntable is carried on two captive (non-detachable) high-quality analog interconnects. Those left and right phono cables go into the left and right input jacks (RCA jacks) of the Graham Slee Revelation M phono stage. The analog-audio output of the Slee phono stage goes into the left and right RCA input jacks on the left-side panel of the Sound Devices USBPre 2, via interconnect cables of your choice (Audioquest makes excellent budget audiophile cables). The Sound Devices USBPre 2 comes with a USB cable to connect it to your computer.
Open your computer's Preferences menu and make sure that in the Sound preference panel, the Sound Devices USBPre 2 is selected as the Input and Output device, and that the Mute checkbox is not selected. You should then find the MIDI/Audio controller application, open the Audio window and again make sure that the Sound Devices USBPre 2 is recognized, and that the sampling rate is properly specified (i.e., 44.1kHz or 48kHz or whatever [*FN]) and that none of the Mute checkboxes is selected. Then, look at Amadeus Pro 2's Preferences > Sound to make sure that it recognizes the USBPre 2.
Open up Amadeus Pro 2, and, under the Sound drop-down menu, select Record to New Document. The pop-up window will at first look like this:
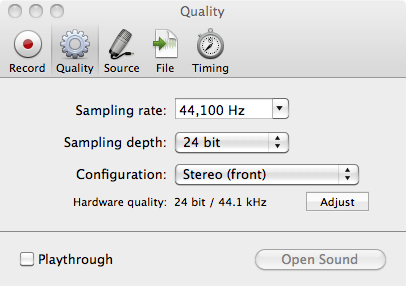
Make sure that the Sampling rate is at least 44.1 kHz and the Sampling depth (bit depth) is at least 24-bits. The silver virtual button in the menu bar that has a red virtual light in its middle is the Record button. Once your LP is ready to play but not yet playing, press the Record button. The pop-up window changes to "Record Pause" mode, thusly:
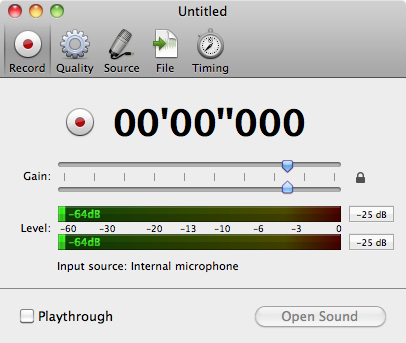
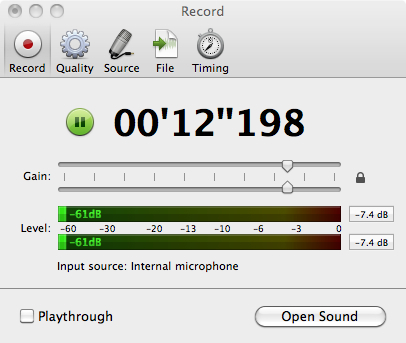
When you press the red virtual button next to the time readout, the software begins recording. You can then carefully lower the stylus (needle) into the lead-in groove. A window with active recording (in this case, ambient room sound picked up by my iMac's internal microphone) looks like this:
Important: To hear the digitized sound playing back through the USBPre 2's monitoring of the Computer (and not the Source) as you record, you must make sure that the Playthrough checkbox is selected. Also, while the Amadeus Pro's default volume setting should work with most phono-stage outputs and analog-to-digital converters, with certain LPs or other sources such as open-reel tapes, some trial-and-error in setting Record levels may be necessary.
After you press your computer's keyboard's Spacebar to Stop the recording, pressing Open Sound presents a waveform of the entire recording, be it a single track or an entire album side. The Amadeus Pro screenshot three images above, of the 1969 Dick Hyman Moog track "The Minotaur," is similar to what you will get. At this point, before anything else gets done, you should save and back up your work. You should trim out the lead-in groove noise (while leaving a few seconds of clean groove sound before the music starts) and the run-out groove noise (again, not cutting immediately after the music fades). Or, if you recorded one track in the middle of a side, edit out the music before and after your track.
Next, you should select the entire track and, under the Analysis drop-down menu, choose Waveform Statistics to determine whether the level is too soft or too loud, and if there are any digital overs (clipped samples). Getting close to 0dB is alright, if there are no overs. And, a few overs are usually acceptable if they are clicks and pops and not program material. A good set of Waveform Statistics looks like this:
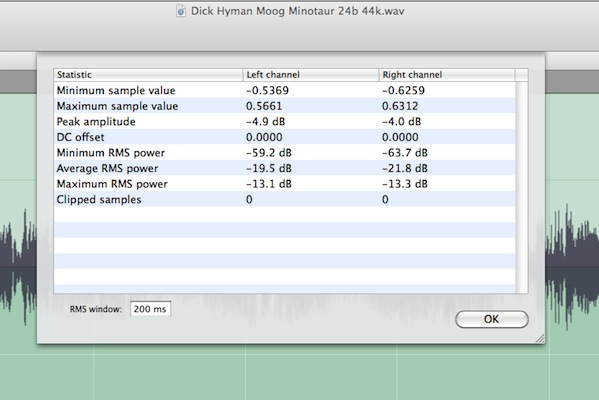
The Peak amplitude value for the slightly hotter channel is -4.0dB, which is where it should be, and there are no digital overs/clipped samples. The DC offset value should be Zero. If it is not, under the Effects > Denoising pulldown menu, select Suppress DC Offset (the toggling capitalization for "offset" is in the original program). DC offset means that the crossover from positive to negative in the musical waveform does not take place at the Zero axis, which can cause distortion. Then, if need be, save the track again.
If you are beside yourself with curiosity, here's some vintage 1969 one-note-at-a-time Moog music from Dick Hyman and friends, ripped using Rega's Planar 3, etc.:
"The Minotaur," from Moog: The Electric Eclectics of Dick Hyman (beginning)
Once the recorded track has passed a basic Quality Control assessment, I would recommend that you archive it as-is. Any further signal processing should take place on a daughter copy. That way, in the event of a mistake that is not Undo-able, you can always go back to what is in effect your Master take, and make a new clean copy and try again.
If you have recorded an entire LP side, you should place a Marker in the middle of each quiet-groove space between the LP cuts. Then, select the entire file, and, using Amadeus' "Windows" pulldown menu, open the Markers window, and under the Selection menu, choose Modify Markers, and then choose and use the "Align to CD Sectors" preset. What that does is to nudge the position of each marker so that it falls between two of the digital sectors that are the building blocks of a CD data stream.
The benefit of having the Markers snap to the nearest 75th of a second interval is that when you burn a CDR from the entire file, the CD track markers are in the right places to enable glitch-free jumping between tracks. If you want each LP track or cut to be a separate file, Amadeus Pro has a convenient Split According to Markers command that creates a new folder of individual tracks—that, as well as the Burn to CD command, are under the Sound pulldown menu. The names of the new individual tracks come from the Marker names, so, giving complete song or movement titles to the markers as you go about inserting them is a good practice.
That gives an overview. The finer points of editing and denoising are too inside-baseball for a blog entry, and in any event Amadeus Pro 2's manual is complete and well-written.
Almost everything above directly applies to making archival copies of 78rpm phonorecords, cassette tapes, and open-reel tapes. The next installment covers monitoring via headphones or loudspeakers, and then this series will be complete.
*FN: Connecting your computer (assuming that your computer is not ancient) to an external audio device enables Amadeus Pro to record and play back up to the lesser of that device's limits or Amadeus Pro's limits. If you have an Analog to Digital converter (ADC) that can digitize at 192kHz, Amadeus Pro can record at that sampling rate. (Amadeus Pro's theoretical record-rate limit is 256kHz, but most ADCs, including Sound Device's USBPre 2, top out at 192kHz.) If you have a Digital to Analog converter (DAC) that can convert PCM files recorded at 384kHz, Amadeus Pro can play them back (but again, Sound Device's USBPre 2 tops out at 192kHz). Neither Amadeus Pro nor Sound Device's USBPre 2 can handle Direct Stream Digital (DSD) files. DSD is the data format of the high-resolution layer of Super Audio Compact Discs (SACDs). SACDs and DSD have not achieved acceptance in the wider marketplace, and are likely to remain the enthusiasms of a minority of audiophiles.