Room correction is catching on in the two channel world. Some will read this first sentence and think that I have lost my mind, some will say "of course," and others will say "really, I had no idea." Room correction is easily one of the most debated topics by audiophiles, and ranks up there with the debate of analog vs digital, tubes vs solid-state, and fancy cables vs generic cables. I am not going to discuss those other debates today. If you are interested you can read my other reviews to figure out where I sit on many of those topics, but today I am going to wade into room correction debate and try to provide my two cents, as well as look at what is easily the best digital room correction software I have used, Focus Fidelity.
Thoughts on Room Correction
I started my audiophile journey in the world of home theater. Unlike in the 2-channel world, room correction is a requirement to deliver high end sound from a home theater. However, not all room correction solutions are equal, and that is the thing I want to focus on. If you are a 2-channel audiophile who hates room correction you either happen to have a perfect room (impossible), enjoy the peaks and valleys of your speaker's response in your room (which is completely possible and many do), or you have not had the pleasure of listening to the results of a high quality room correction system (honestly very likely).
I am going to narrow my focus to talk specifically about digital room correction. While analog solutions do exist, I cannot speak to them, other than to say no matter how impressive they are they simply will not be able to provide the same degree of correction as a properly implemented digital filter.
First let's talk about what the ultimate goal of room correction is in its most basic form. The goal of room correction is to align your speakers' responses to match a target curve as closely as they possibly can. A target curve specifies the volume output your speakers will produce at a specific frequency. Target curves can be flat (the volume of 20Hz is the same as the volume at 20kHz), or they can take on a slope (most common), or match to a known style of target curve such as a Harman curve or a house curve. Both of these curve types are meant to be perceived by the listener as flat, but in actuality output much more bass and lower the high frequencies to compensate for how human ears hear in normal sized rooms. Alignment to a target curve and correcting the frequency response is the most basic version of room correction. When done correctly it can produce great results, but it is often not done correctly. This leads to the perception that a corrected system sounds dull or lifeless. While this is not the case for properly corrected systems, these problems are often caused by over correction (we will talk about that shortly) or by selecting a target curve that does not align to your taste.
The most common way to do target curve alignment and frequency response correction today is parametric equalization (PEQ). PEQ can be found in Roon, AURALiC devices, and several other DACs and streamers. Most PEQ systems require the end user to take measurements and use a piece of software like Room EQ Wizard (REW) to generate PEQ filter values. These filter values then get entered into the DAC, streamer, Roon, and the resulting output has the PEQ filter applied to it. PEQ works by designating a target frequency, and controlling the shape (width) of the correction filter (q), and the boost or cut value (with the goal of of smoothing the peaks and valleys to create a smooth response.)
The thing to remember is that there are some things that should never be corrected. Examples are bass nulls, or sharp and narrow deviations in the frequency response which when corrected will either result in little change or produce other odd audio artifacts. The other thing to keep in mind is that frequencies below 500Hz are where you will pick up the most bang for your buck in room correction. Below 500Hz is where your room really starts to mess with your speaker response, creating peaks, valleys, and nulls. Above 500Hz, the room is still affecting your speakers response, but much less noticeably. Applying correction above 500Hz becomes more about shaping the midrange, and cutting the high frequencies which while useful is normally less noticeable then below 500Hz. It is also possible to overcorrect frequencies above 500Hz, which can lead to a sound that can be perceived as dry and unnatural. In my personal experience, I have been able to achieve and have heard exceptional PEQ'd systems when correction is only applied below 500Hz. However, automated room correction systems that focus purely on frequency correction, often times by default, correct all the way to 20kHz, and in many cases cannot be configured not to.
More advanced room correction systems integrate time domain correction along with frequency correction. This is really important as human hearing has been shown to be more sensitive to time alignment issues, which makes sense as the human auditory processing uses timing information to predict where a sound came from. A properly time aligned audio system can paint a shockingly realistic sound stage, but the same system with timing anomalies simply will not. So why does an audio system need time alignment? If you are using speakers with more than one driver, or you are using speakers with a separate subwoofer, or your speakers are not perfectly symmetrical to your listening chair, there is likely going to be phase misalignment between each driver, which means that certain frequencies will arrive at your ear slower then others. The same issue can also create a ringing affect, which can be seen using a impulse response measurement. A more common room correction technology that employs both time and frequency correction is Dirac. Dirac has become very popular over the last five or so years, and is built into many home theater and 2-channel devices alike.
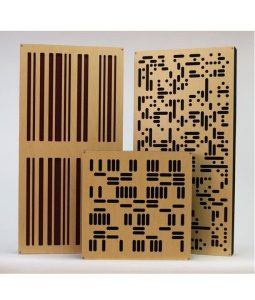
The problem I have run into with Dirac is that I have never loved the results from Dirac for my 2-channel system. When working in my home theater, Dirac is the way to go, but for my two channel listening experience I always preferred no EQ and to simply let my treatments do as much work as they could. My assumption was that room correction (for 2-channel systems) was probably not for me.
My curiosity was piqued though when I began reading more and more about convolution filters, which can be used within Roon as well as other computer based audio players. The issue I initially faced was it was unclear to me how to generate these filters. The process of measuring and generation seemed quite complex, that is until I stumbled across Focus Fidelity. I was watching a talk given on Digital Room Correction by Mitch Barnett (I highly recommend this talk for those who are interested in learning more about this topic). At the end of the talk he made a few recommendations of software that can generate filters properly and take all of the concepts discussed above into account. Focus Fidelity was one of his recommendations. Focus Fidelity was also the only software on the list that is designed to average the filter response over multiple measurement points.
A Note about Target Curves
I cannot overstate the importance of selecting the right target curve for your room, speakers, and preferences. Many believe the correct target curve is a flat one. That is incorrect in a normal home, the correct target curve is a curve that produces a frequency response that the listener perceives as flat. Human hearing is not linear, which means that in a normal sized room, with a normal distance between a listener and their speakers, bass has to be produced at a higher volume than the mid-range, and higher frequencies need to be reduced in volume relative to the mid-range. The result when done correctly is a curve that is anything but flat, but will be perceived by the listener as flat. Choosing the correct target curve for your preferences and your listening room is incredibly important and getting this choice wrong will result in disappointment, no matter how good the room correction solution is.
Review System
- DAC: DCS Rossini
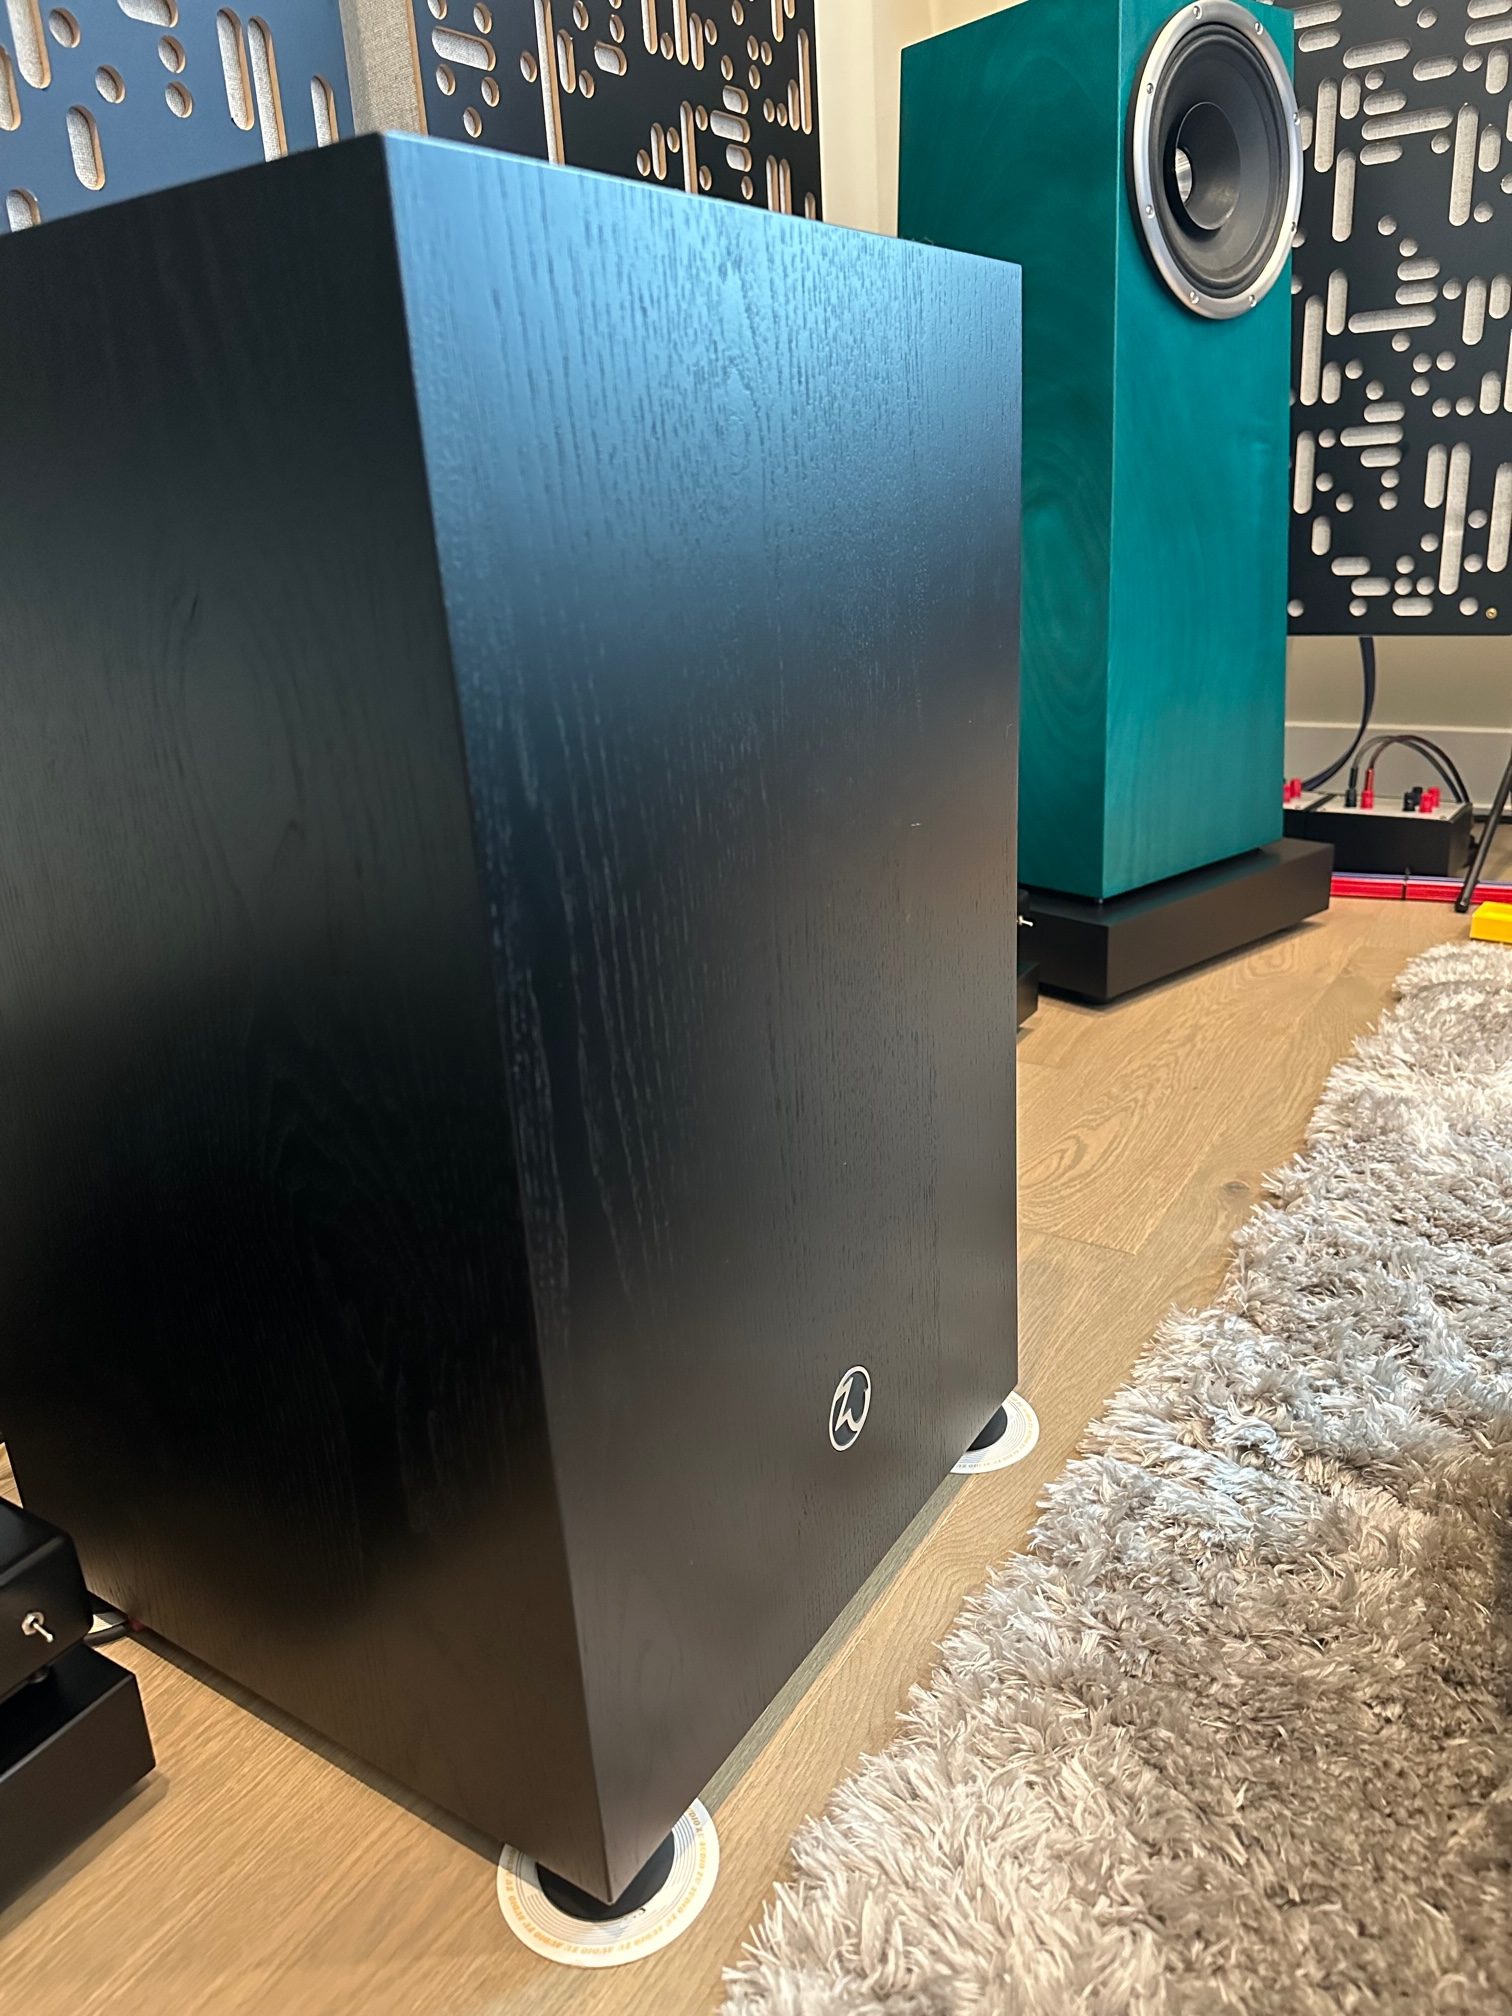
Source: Roon Core (using Focus Fidelity generated Convolution Filters) - Speakers: Zu Soul 6
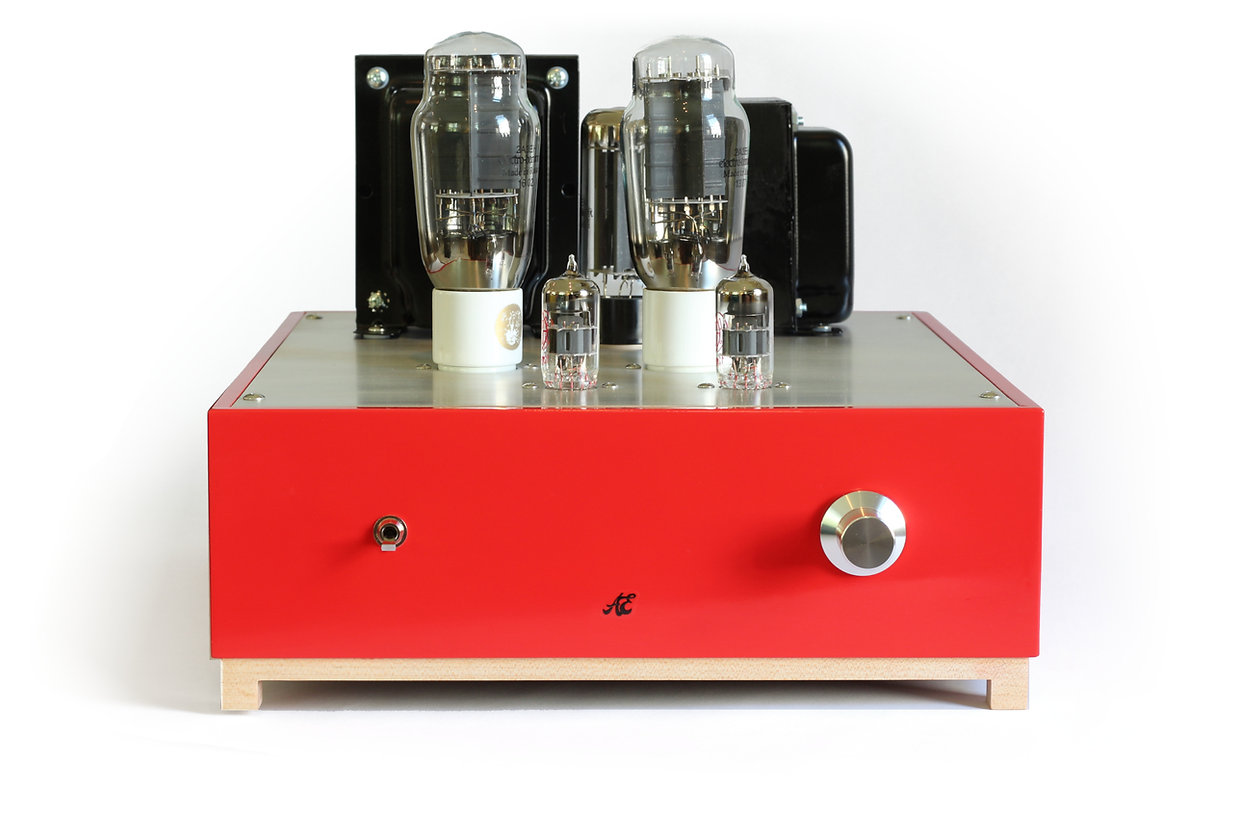
- Amplifier: ampsandsound Zion
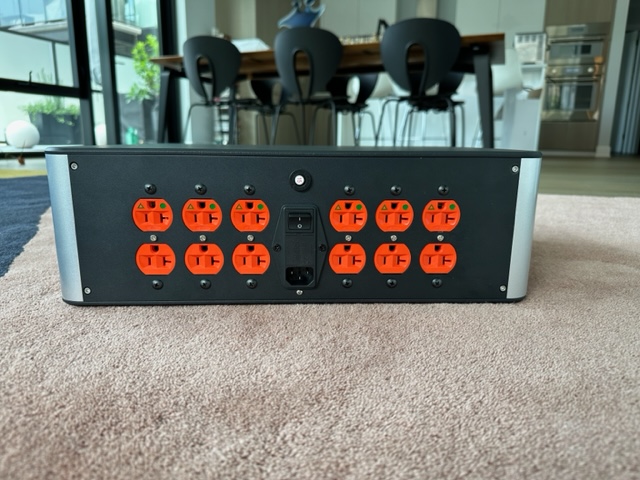
- Power Conditioner: PS Audio P12
- Subwoofer: REL S510
- Cabling: Wireworld Eclipse, WyWires Platinum
- Focus Fidelity Impala: Version 1.10.5.0
- Focus Fidelity Filter Designer: Version 1.10.5.0
- Focus Fidelity Filter Designer and Impala
I reached out to David Broadhurst, the creator of Focus Fidelity, to ask about doing a review of his software and he agreed. Within a few days I was set up with two pieces of software, Focus Fidelity Impala, and Focus Fidelity Filter Designer.
Focus Fidelity Impala is a state of the art digital room measurement tool, specifically designed to take measurements for Focus Fidelity Filter Designer. It can be used simply to take measurements as well, and is available for free with a sign-up to the Focus Fidelity mailing list.
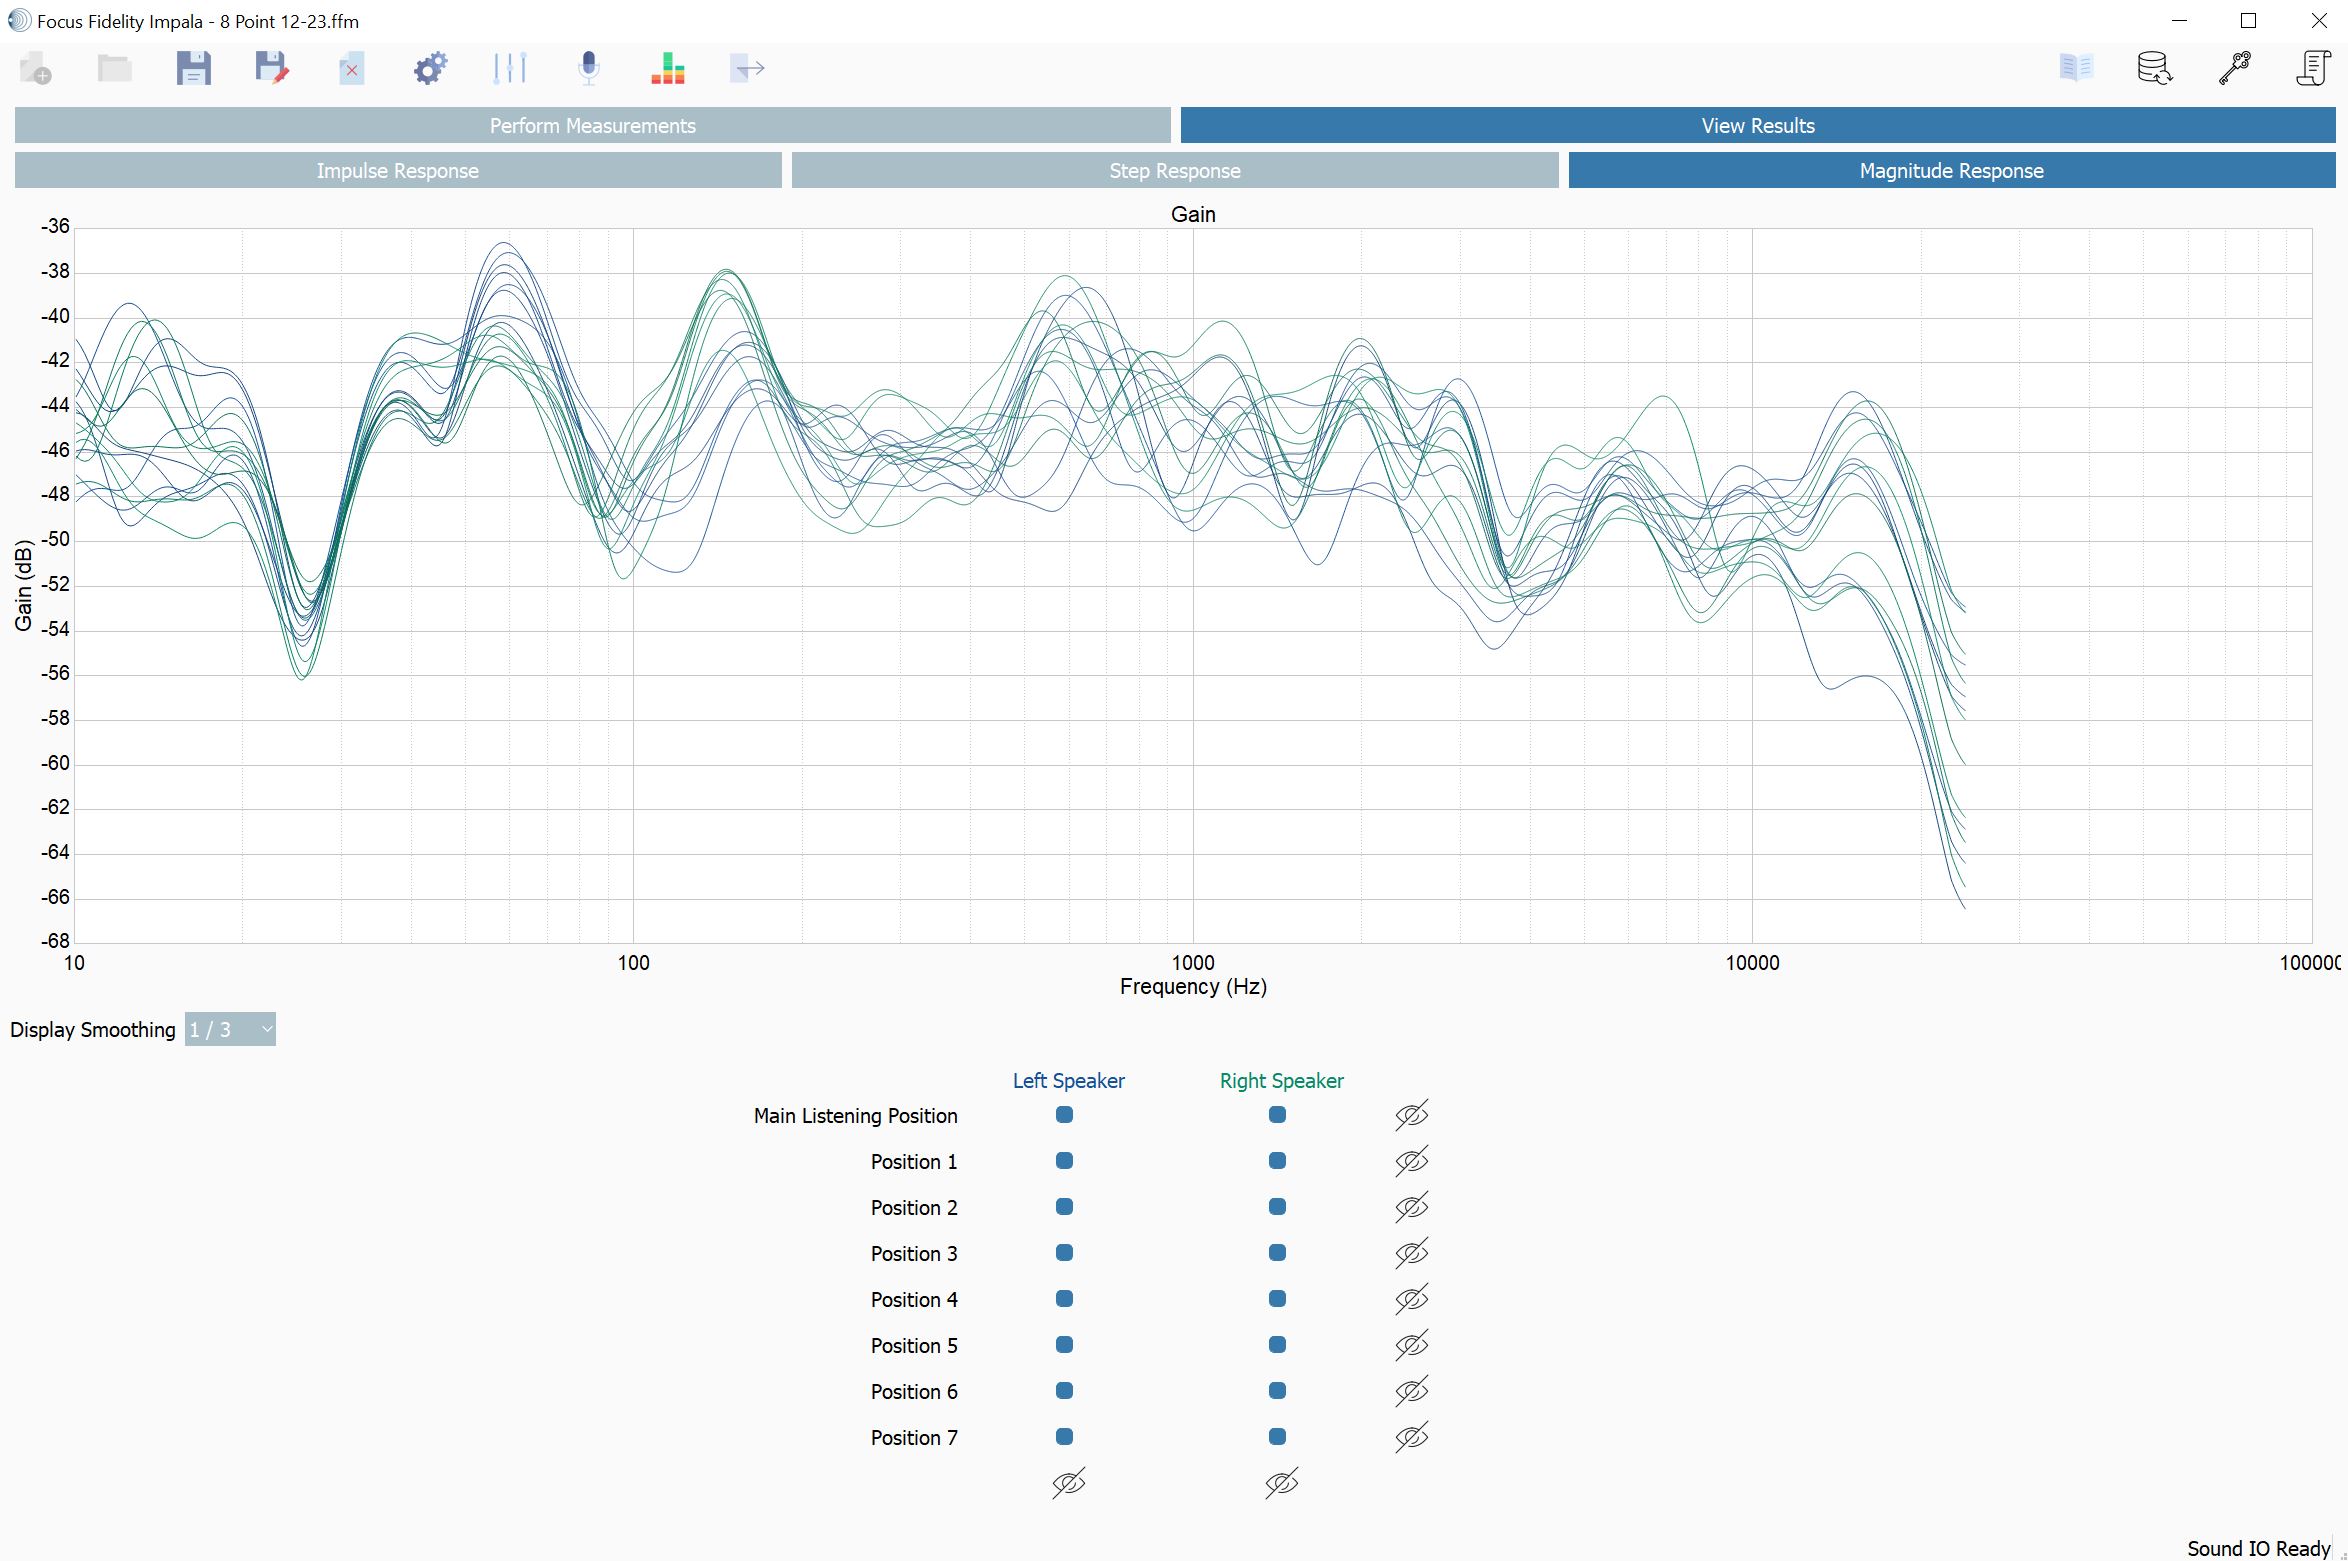
Impala Measurements
Setting up an Impala project involves choosing the number of room measurements, and setting the sample size. Once set up you select your input (measurement microphone), and your output (DAC), then you also upload your microphone calibration file. You can check your speaker levels, and then you place your measurement microphone at ear height in the primary listening position. After you take that first measurement, all other measurements should be conducted symmetrically around the listening position at different heights and should cover the typical listening area.
It is recommended, that you take at least eight measurements, do not skip this. I will fully admit that given my single seat listening room, and haste to hear the results, the first few times I tried Focus Fidelity, I did so with only a single measurement, and the results were… simply not good. When I sat down and did a full eight positions worth of measurements, the results were incredible, so seriously, take at least eight measurements and don't be like me.
Measuring with Impala is incredibly simple, after the microphone is positioned, click the measurement button. Your speakers will generate the test tones, the measurement will be captured, and then you can move the microphone and take the next measurement. You can view the impulse response and frequency response of your measurements within Impala, which is awesome if you want to understand how your room and your speakers measure without correction.
The other thing that is really helpful, is that when you set up an Impala project, you can import a filter to be applied to the measurements. What this means is that after you design your filter in Focus Fidelity Filter Designer, you can actually import that filter into Impala, and measure your speakers' frequency and impulse response with the corrective filter applied (which is something that is surprisingly hard to do with other software). To not leave you in suspense, I was incredibly impressed at the results of filters generated by Focus Fidelity as measured with the filter applied.
Not only does Impala make it easy to measure, but David has done some things to make its measurement capabilities incredibly advanced. While I was working on this review, David released an update to Impala to detect and correct for clock skew. Computers make everything fun, and if you are like me and use a UMK-1 or another USB based measurement microphone, you may or may not know that there is a little tiny computer in that microphone, similarly, there is a small computer in your DAC. Your computer, your USB mic, and your DAC all use a clock to schedule their tasks. The problem is all of these clocks are a little off from one another, which can result in clock skew. Long USB cables can also introduce additional skew. This skew can cause errors when performing frequency sweep measurements. With the latest update to Focus Fidelity Impala, it will now apply clock skew correction. It does this by measuring the clock skew, and then apply the skew correction to the measurement results. The result allows you to get equivalent measurement fidelity from a USB measurement microphone as you would from a analog mic and dedicated ADC preamp. Which is simply awesome given the cost and complexity difference.
Once you take all of your measurements in Impala, you save your Impala project, and you start building your filters using Focus Fidelity Filter Designer. Focus Fidelity Filter Designer is where the magic happens, it is also the paid part of this software, coming in at $249.
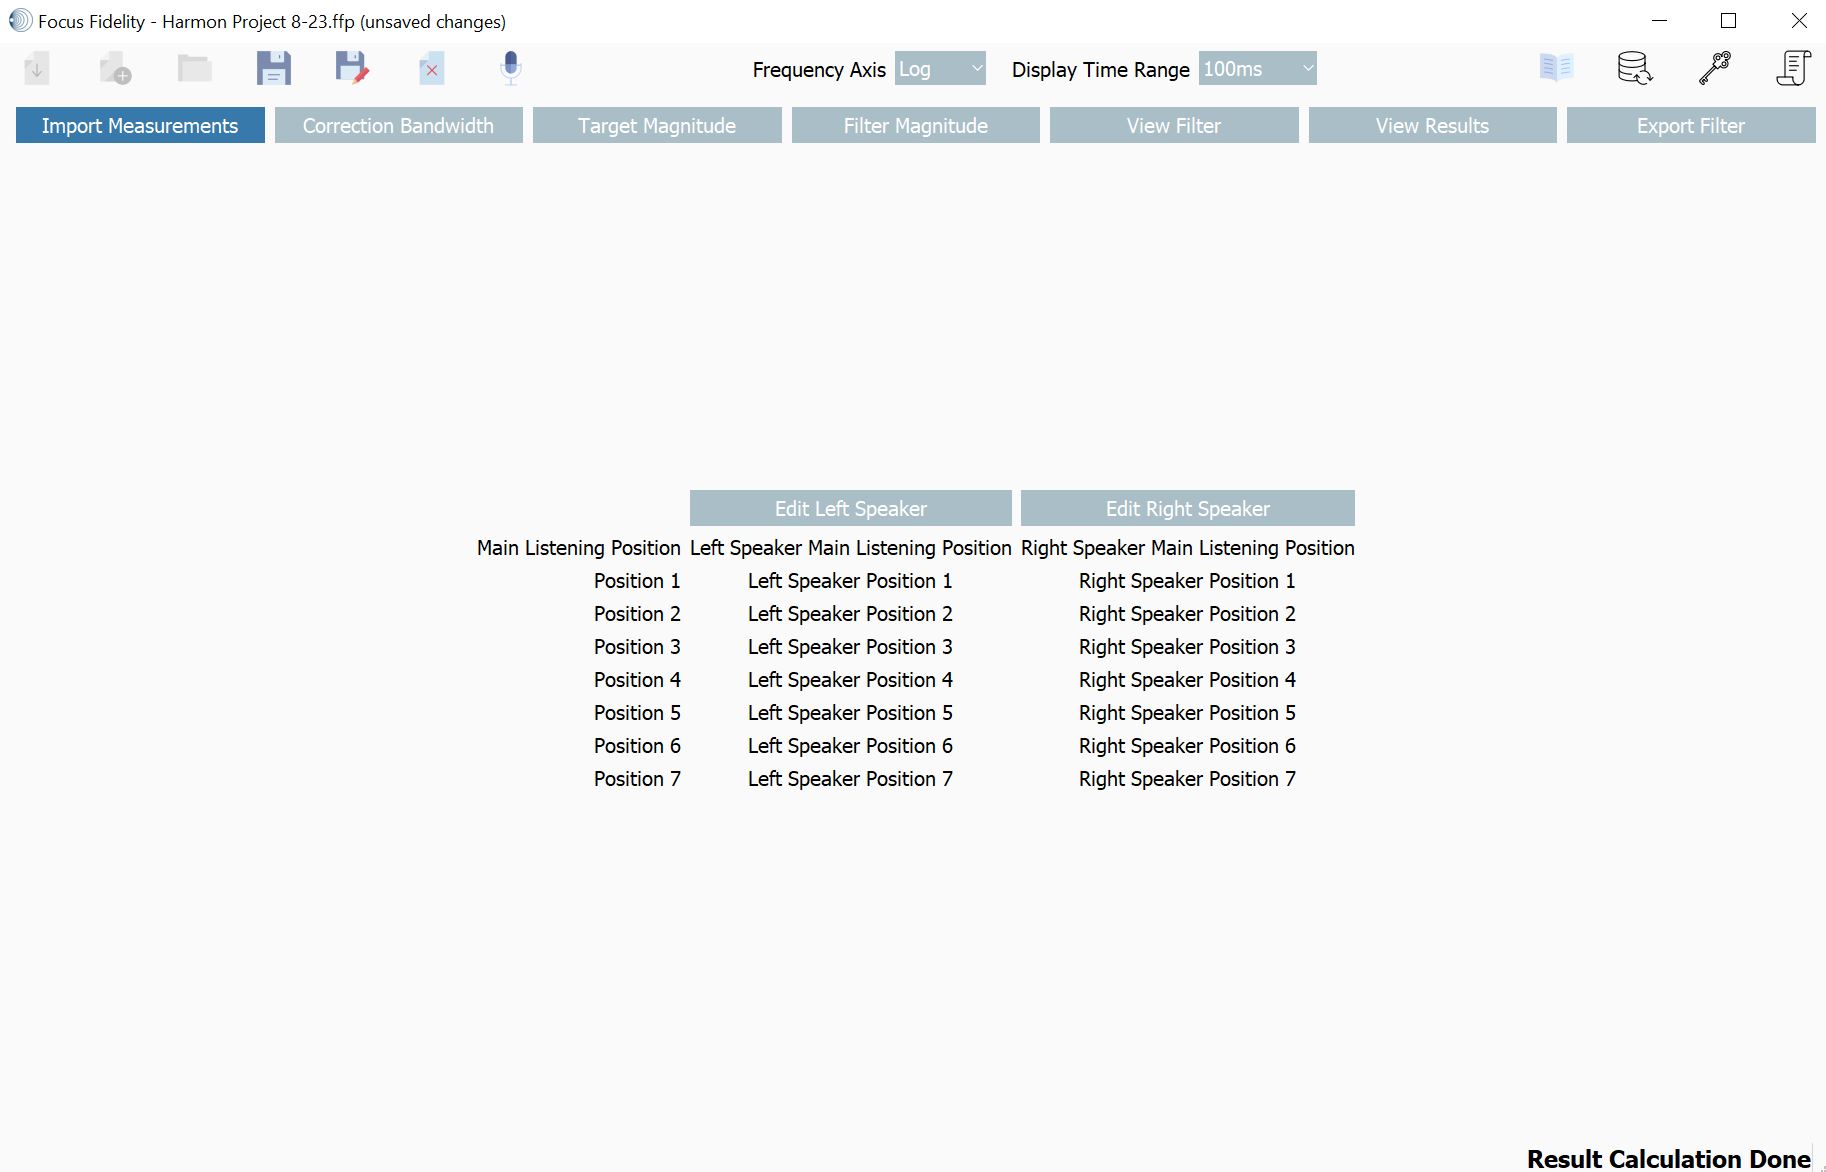
Focus Fidelity Filter Designer – Measurement Import
Once you open Focus Fidelity Filter Designer, the first thing you do is import your measurements. If you used Impala, you simply import the Impala project. The software then walks you through the three steps to allow you to generate your filters.
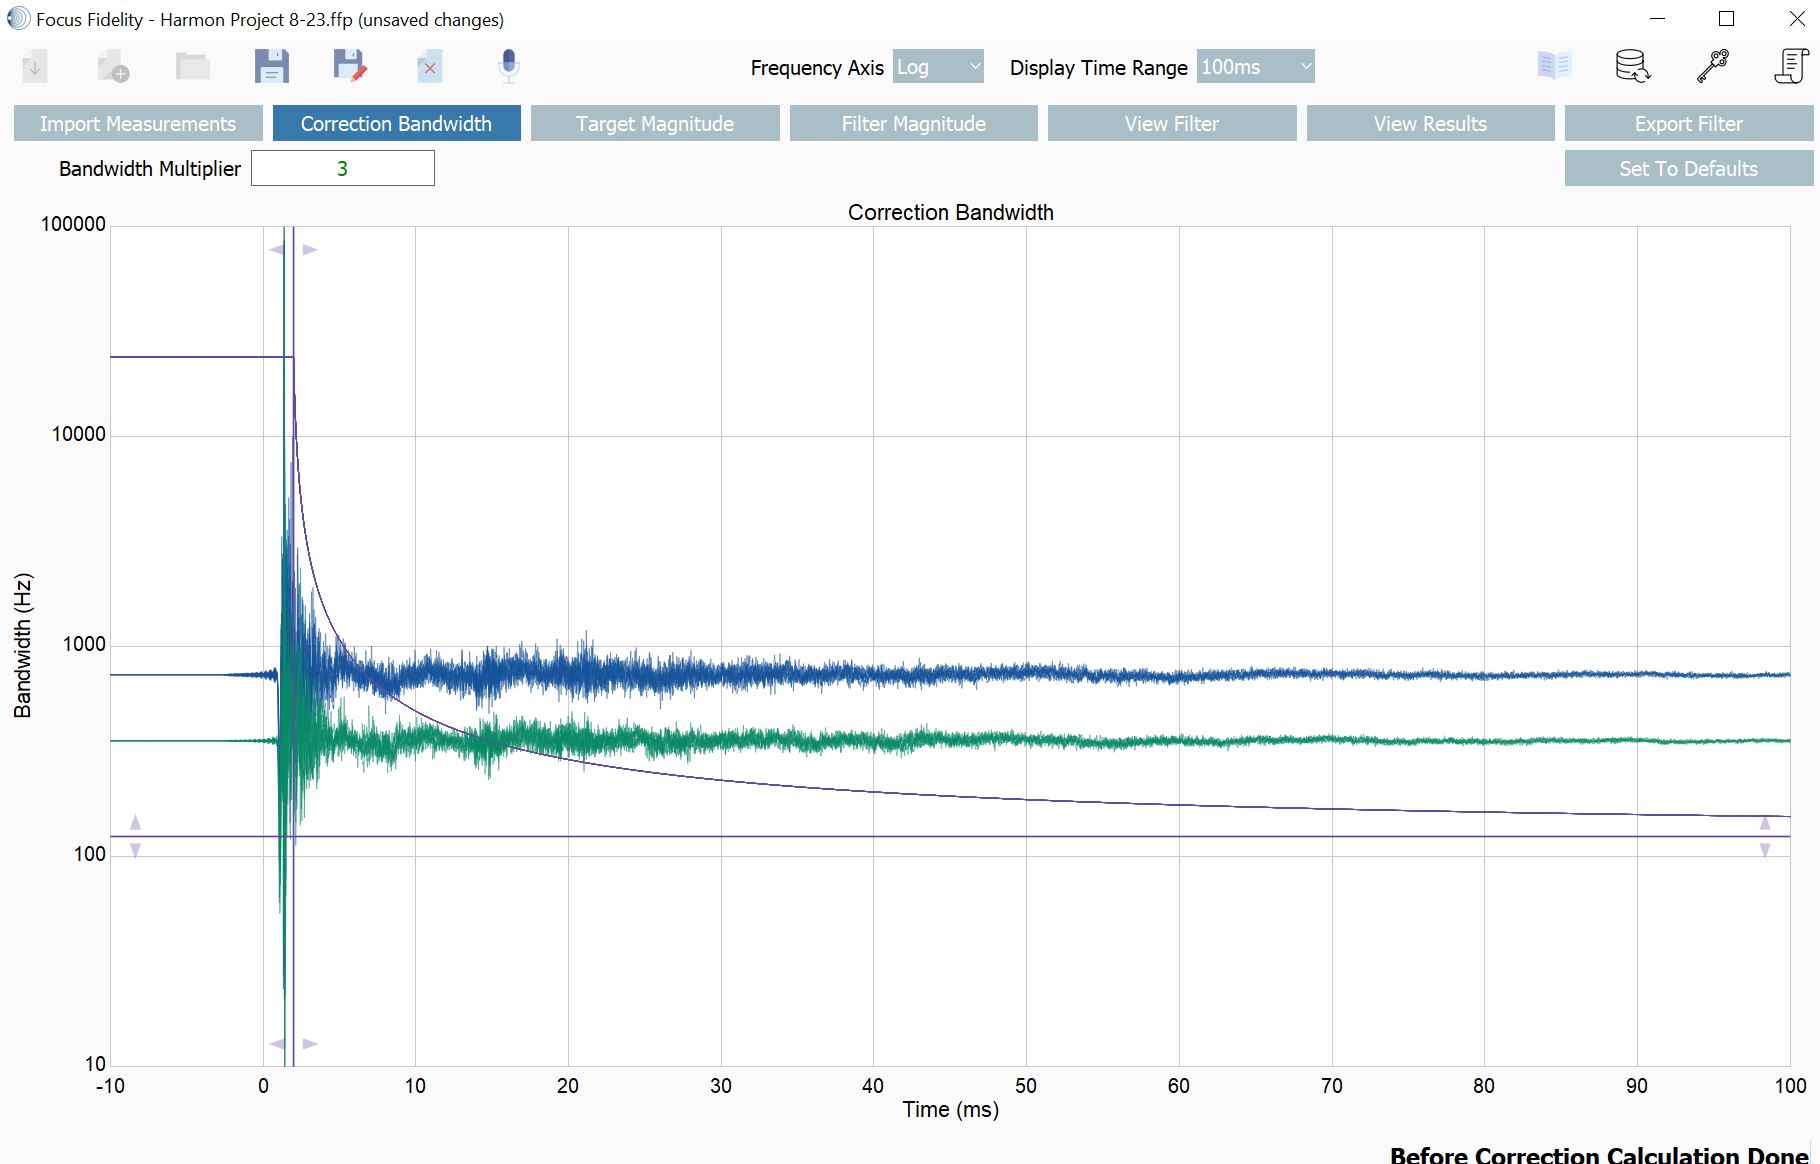
Focus Fidelity Filter Designer – Correction Bandwidth
The first step allows you to set your correction bandwidth. Remember what I said above, in my experience bad room correction is often times the result of over correction, especially in higher frequencies? Focus Fidelity Filter Designer allows to you manage for over correction with the correction bandwidth. The correction bandwidth determines the strength of the correction, or the amount of correction applied as you increase in frequency and time. It is automatically designed to apply more correction in the bass and lower mid-range than the higher frequencies. The correction bandwidth is controlled by a multiplier, which is set at three by default. Higher values apply more correction, lower values apply less. While I thought the default value sounded pretty good, because of my treated room and my preferences, I lowered the bandwidth to two and found that I preferred that.
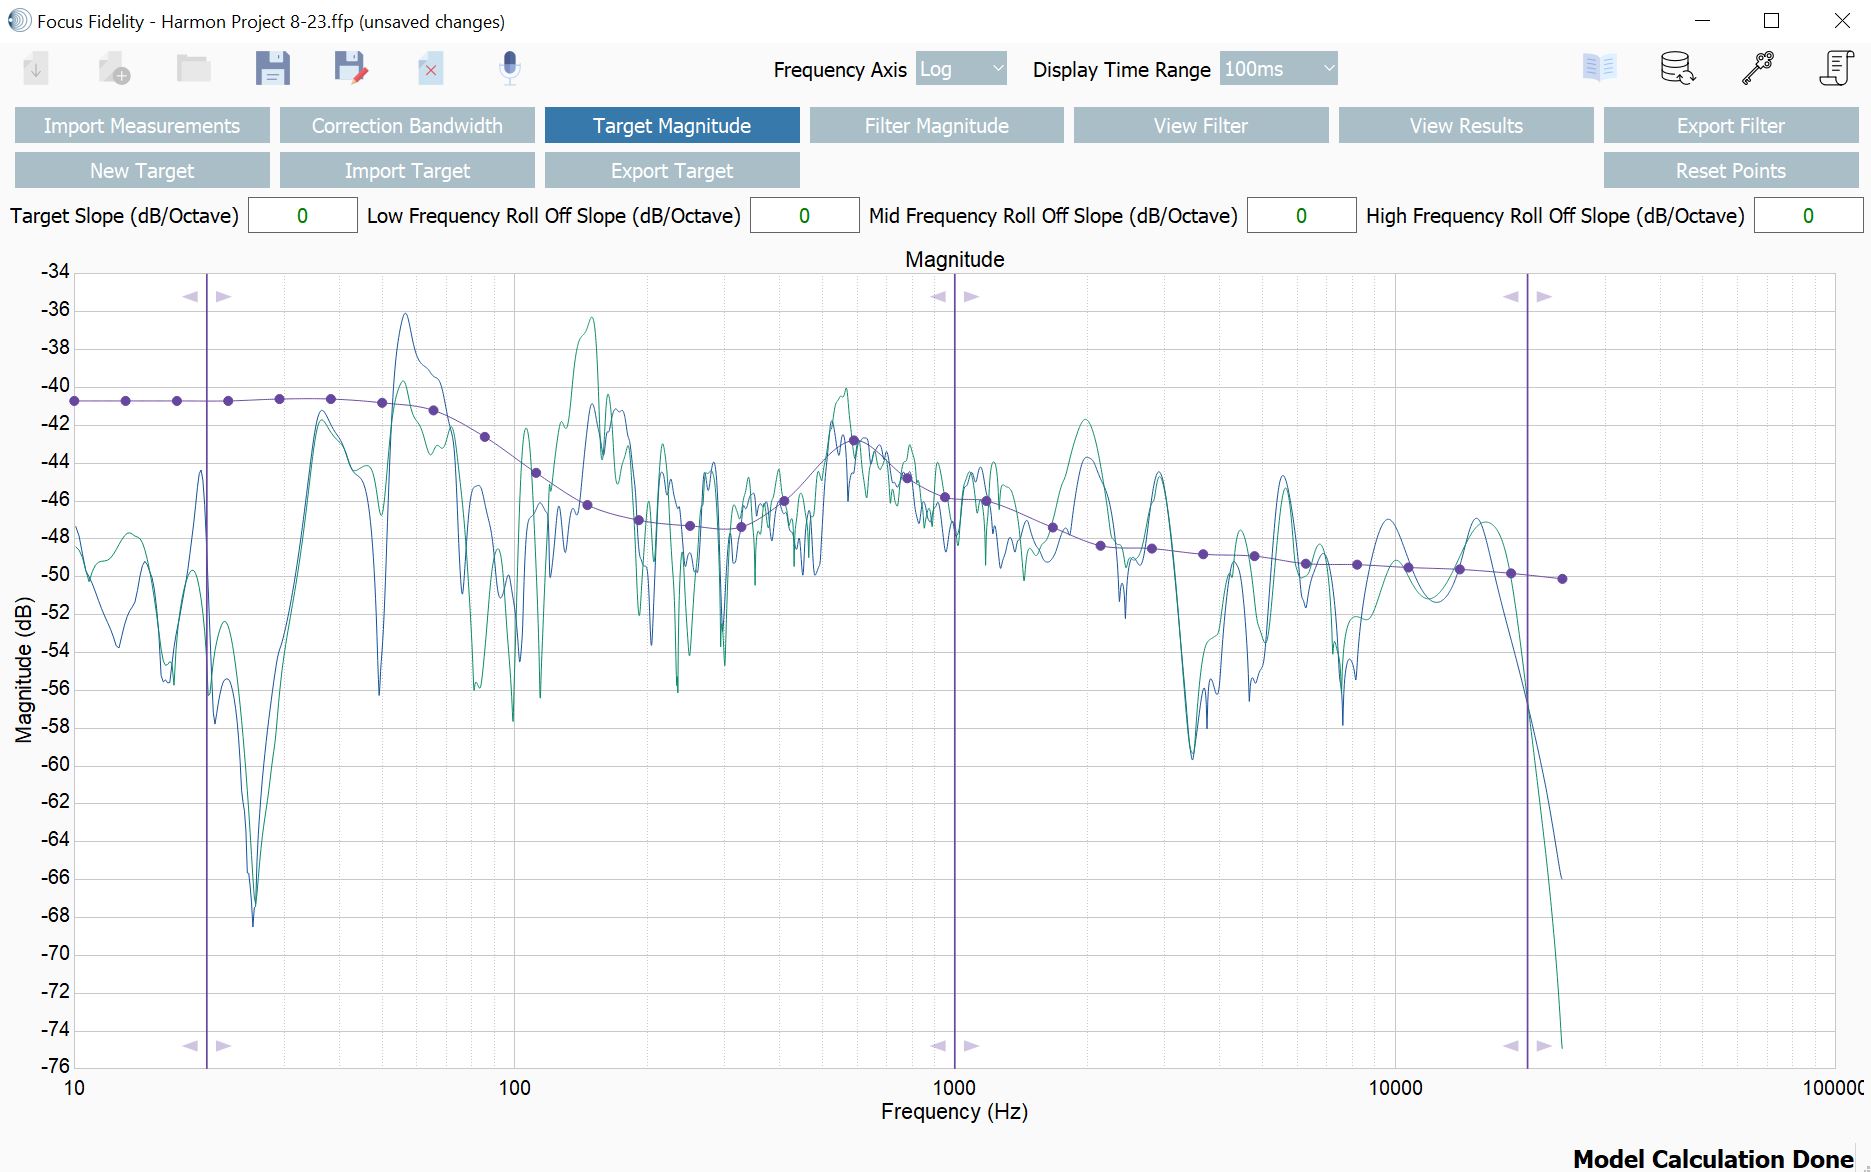
Focus Fidelity Filter Designer – Target Curve Selection
After you set your correction bandwidth, it is then time to set your target curve, in the target magnitude tab. This is the part of the process that will force you to be patient, as the calculations required to advance to this step are complex and take between two and five minutes to complete (depending on your computer). It really made me sit back and think about how other software I have used in the past simply advanced and never really took time to perform calculations. It made me wonder what that other software skipped, that Focus Fidelity didn't. Once calculations are complete, you can select your target curve, or use the default curve that is calculated for you. The default curve is meant to deliver a response that is true to your speakers sound, but correct it to be smooth in your room. This was not my preference, as I found the resulting curve to be a little dull. My Zu's have a wild ride of a response in my room, and I actually really like the way they sound. They have boost in the bass region, and a uptick around 600Hz creating an almost U like response. The default curve lowered the bass and reduced the 600Hz boost to remove the U shape, which for me resulted in a linear sound, but a boring sound.
With Focus Fidelity Filter Designer you are free to build your own curve, save the curve, import other curves, and visually edit the curve. In my case, this is where I used David's supplied Harman curve to start. For those not familiar with the Harman curves, it is basically a house curve, that takes into account how human hearing perceives low frequencies in typical rooms and corrects for a subjectivity flat and energetic sound. There has been significant research done in the process of designing the Harman curve, and I can confirm that it sounds awesome in my room. I then modified the Harman curve to re-add the boost in the 600Hz region, and smoothed the response around it.
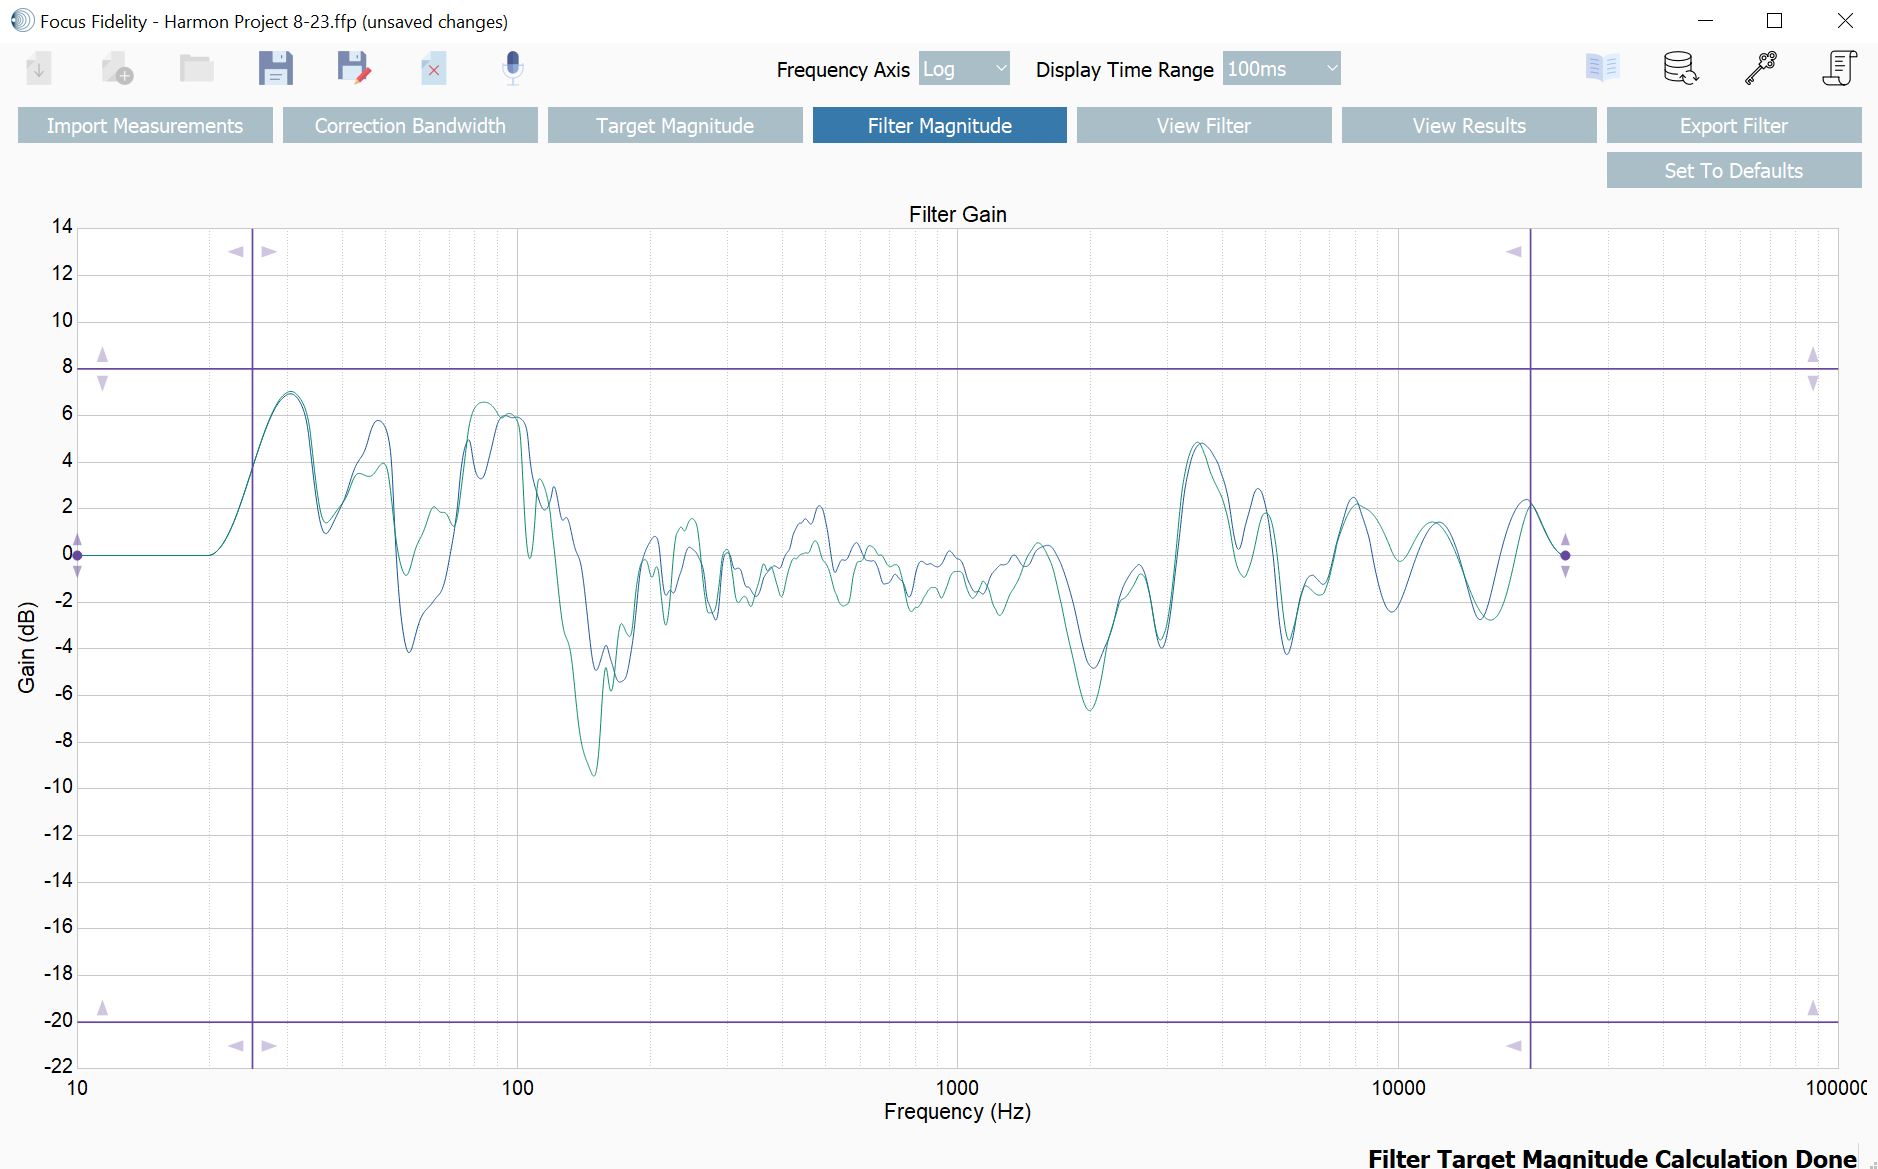
Focus Fidelity Filter Designer – Filter Magnitude
Once you have configured your Target Curve, you can then move onto the filter magnitude settings. This allows you to control the maximum filter gain, so that you can ensure that you will not accidentally overdrive your speakers. In my case, I checked to make sure that my filter gain is at or below 8dB, and left it alone.
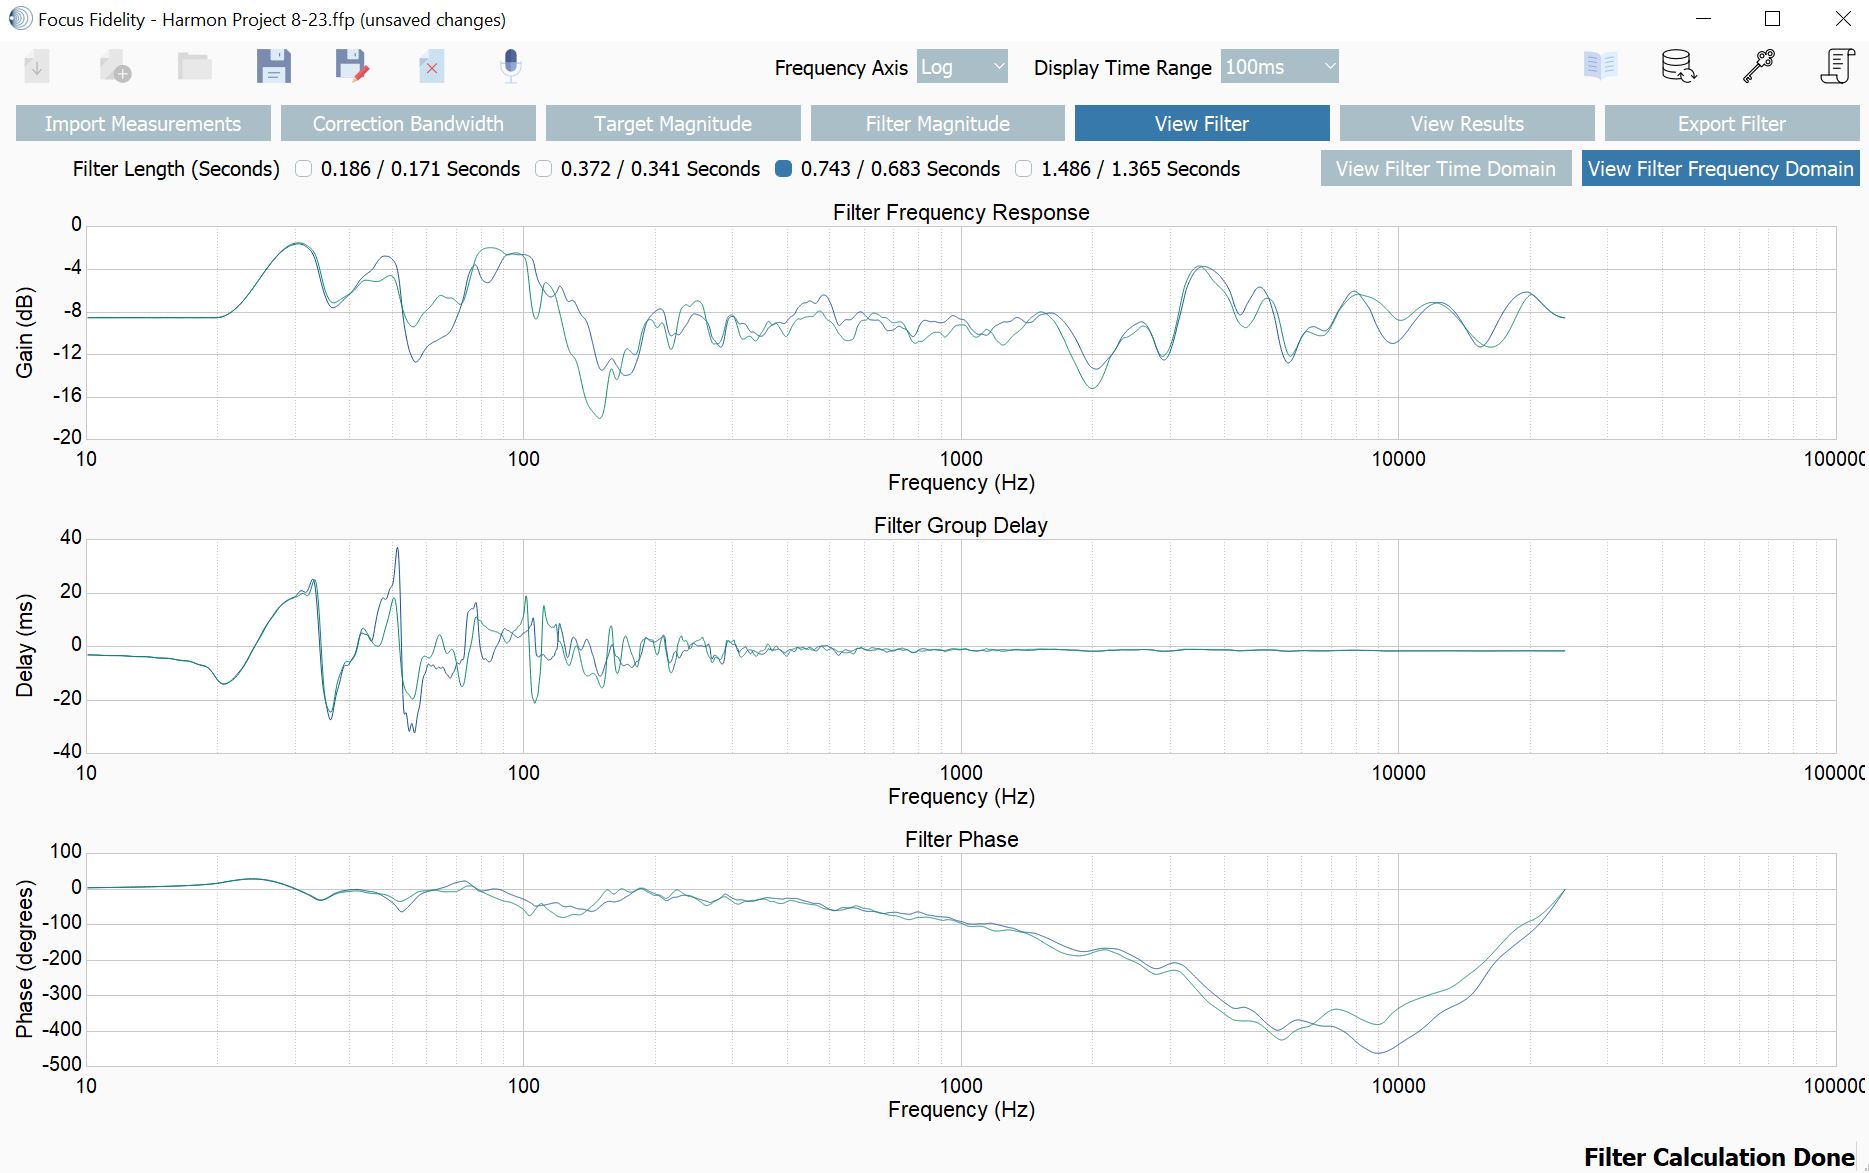
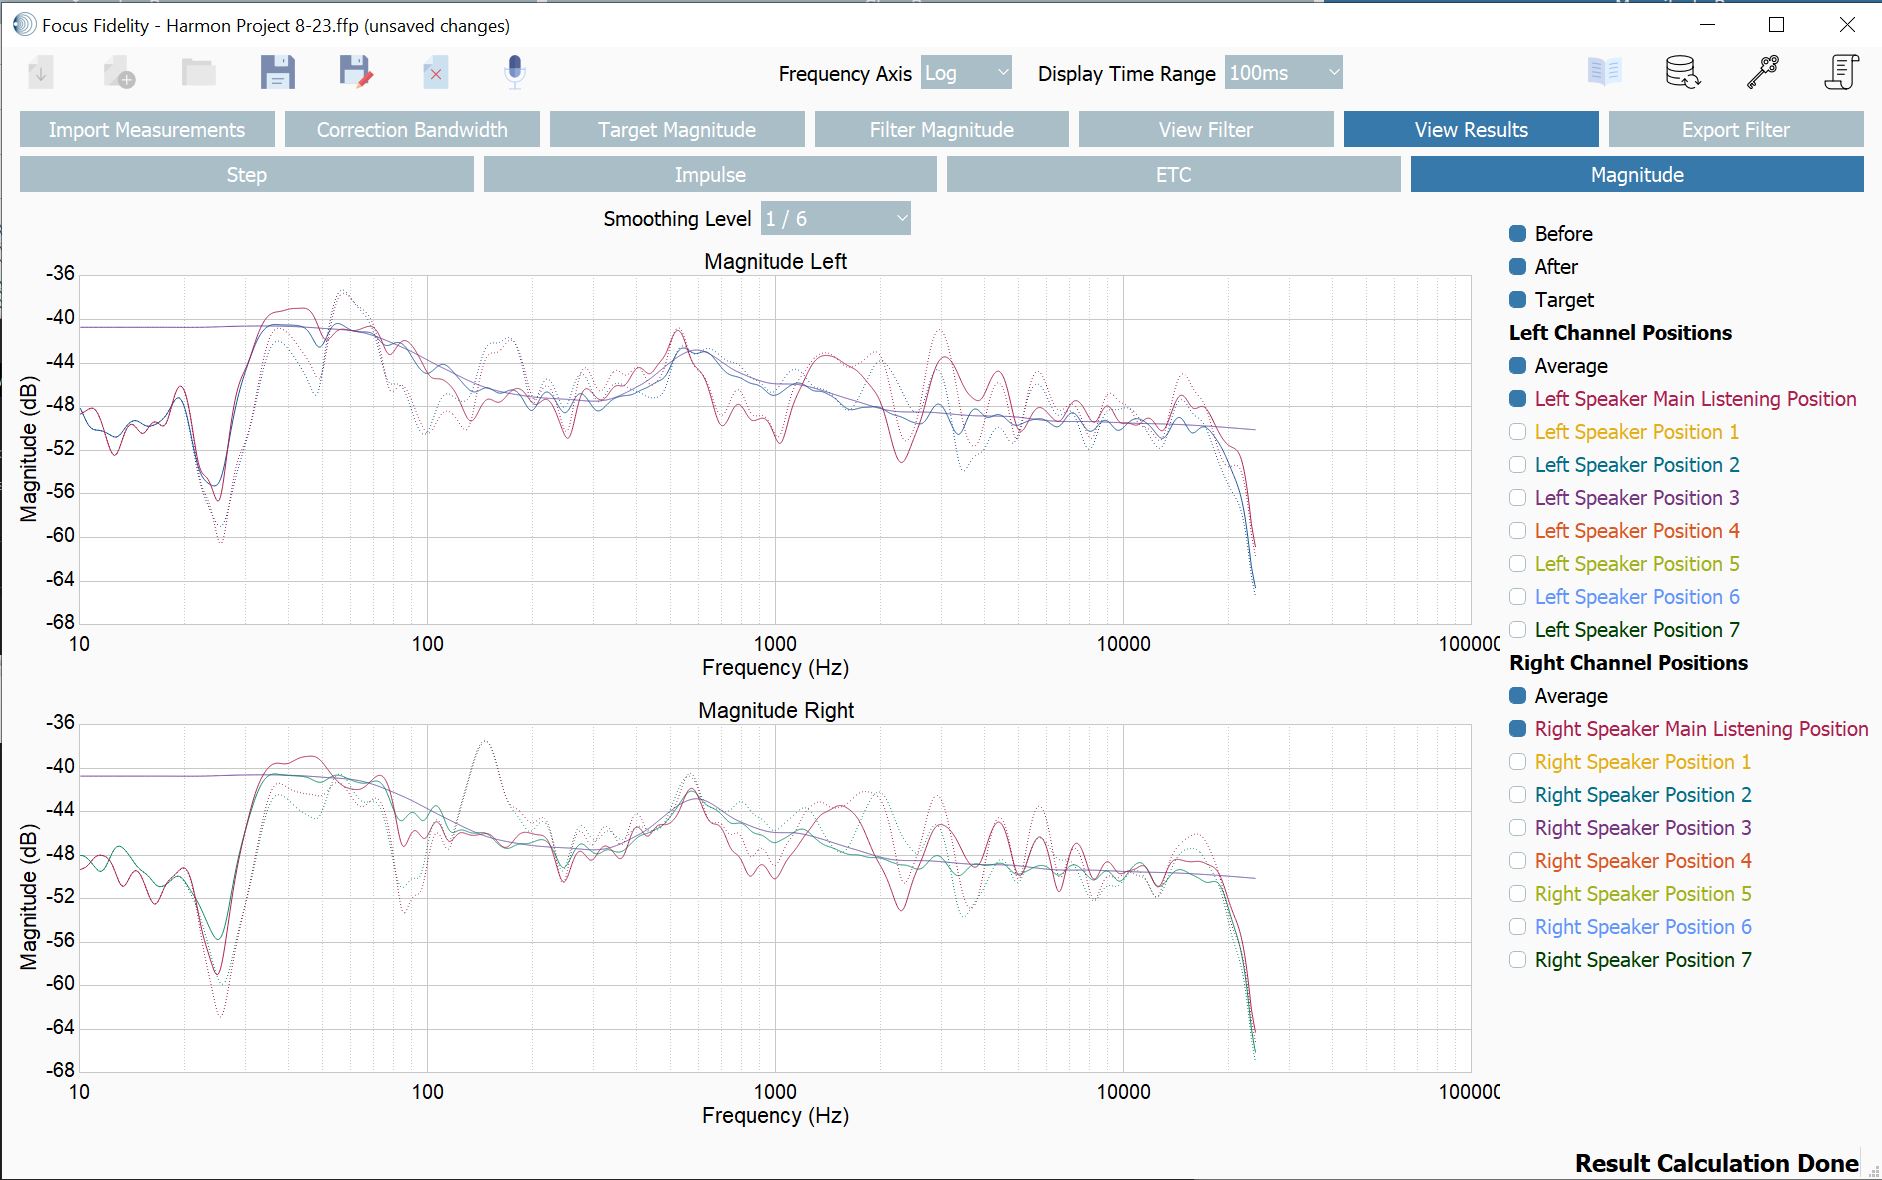
At this point your filters are ready to be generated, Focus Fidelity supports three filter lengths, and defaults to the middle length which should be good enough for most applications. A filter is generated for each audio sample rate, which will be used by the audio player when playing music at that sample rate. At this point you can view the filter, speaker response before filter, expected response after filter, and the same for the impulse response as well.
Completed Filter
The next step is to export your filter, which will save the filter files in a folder. You are now done generating your filters. The entire process takes about an hour, and for the most part requires you to simply move a microphone and click a "next" button. The process is as easy as doing Dirac measurements but offers way more control.
Using your new filters
In my case, the target for my filters was Roon. Given that I pretty much exclusively listen to music using Roon it makes sense for me to also apply room correction in Roon as well. How do you get your filters into Roon? It is incredibly simple:
- Create a zip file that contains all of your filters (one for each sample rate)
- Open Roon, go to the DSP settings, at a convolution filter
- Upload the zip file from setup 1 to the convolution filter
That is it. Once you have done this you can sit back, press play, and hear your new filter, applied to your music. You can also look at the Roon signal path and see your filter being applied. When you do, you will see the convolution step, and under that you will see a number of taps. Generally this is a number greater then 33,000 (which is the default tap length for 44.1kHz). Each one of these taps can be thought of as a slider on an old analog EQ, you just have way more of them. With you filter engaged, you are correcting not only for the frequency response, but also time alignment.
Depending on your room and speakers the results can vary between being obvious, to being subtle. In my treated room, the results were obvious, but I would call it a 10% increase in performance, especially in bass smoothness and coherence.
You do not just have to stop there though, you can also generate multiple filters that suit different types of music or different listening habits and upload each of those into Roon and save them as different DSP presets. I originally thought I would end up doing this, but the resulting filter using my modified Harman curve, with a correction bandwidth of two is so universally right to ears that I have no need to switch between filters.
One thing to keep in mind though is that with your filter applied, the resulting audio track is going to be quieter than without the filter applied. Blind tests have found that when comparing audio tracks, that volume is perceived as better, with most choosing a uncorrected track if it has even 1dB more gain. Where when heard at the same volume most will choose the corrected track. What I am trying to say is, if you plan to compare filters, or compare your filtered results to your speakers without a filter you must volume match. If you plan to do this, while I have not tried it, Accurate Sound HLC is a piece of software designed to volume match different filters so you can quickly A/B between them.
Compatibility and Documentation
As of now Focus Fidelity Filter Designer and Focus Fidelity Impala only work on Windows Computers. When I asked David if he had plans to support Mac OS any time soon, he said that it is something he is actively working on, but no formal timeline has been announced. It is possible to run Focus Fidelity in a virtual machine on a Mac if you wish to though.
For those who have a Windows desktop, and a Mac laptop, but do not want to lug the desktop over to the audio system to perform measurements, you can use REW (which is available for Mac OS) to take measurements, and import them into Focus Fidelity Filter Designer. You will lose some of the simplicity, and you will lose the clock skew correction, but for some this may be worth not having to move the windows desktop. I got lucky that with a few USB extension cables, I was able to connect my desktop to both my DAC and measurement mic without moving it.
I want to specifically call out that David and the Focus Fidelity team have gone above and beyond with their documentation, please do not try and follow my review, download his docs, and read through them, they will guide you through the entire process from start to finish. All I can say is I wish every company documented their products as well as Focus Fidelity did.
Concluding thoughts
I have never heard room correction that I preferred to simply listening to a speaker uncorrected, when listening in a treated room. That is until Focus Fidelity generated my current convolution filter. My system simply sounds better: bass, midrange, and high frequencies feel more coherent, and staging feels more accurate. In the world of high end audio, $249 for a 10% increase is a bargain, given that my RCA cables cost more than that and provide a few percentage points at most of improvement. Remember, I have a treated dedicated listening space, but I also tried Focus Fidelity with my living room system, and the results where incredible, so you may get even more out of this $249 purchase then I did.
If you are dead set against room correction, then I will never convince you that it is a good idea for a two channel system. If you have been curious, or are open to room correction, and have a Windows PC, then go buy Focus Fidelity Filter Designer and pick up a Mini DSP UMK-1 or UMK-2. David has done an incredible job documenting each step in the process for measuring, designing your filter, and applying those filters to Roon and other common software packages.
If you are still on the fence about the $249 purchase, keep in mind that over three months, David shipped at least three updates to both Impala and Focus Fidelity Filter designer, each update brought a new feature or a stability improvement. Saying it differently, your money is buying you a product that is likely to improve over time, and you don't even have to pay a monthly fee for it. How much better can it really get?
Thank you to the Focus Fidelity team, you guys knocked it out of the park.
Focus Fidelity Filter Designer
Retail: $249
Focus Fidelity