There's anarchy afoot in the listening room; LP's are stacked everywhere, yet even in the shadow of chaos, there is a renewed love for that old black plastic magic. Yep, spinning records has become quite the pastime again, and it all started with a realization that I wanted better vinyl playback. While writing Phase One (HERE) of this three phase narrative, I revealed parts of the analog chain I hoped to improve.
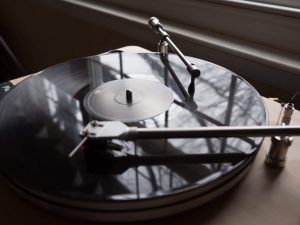
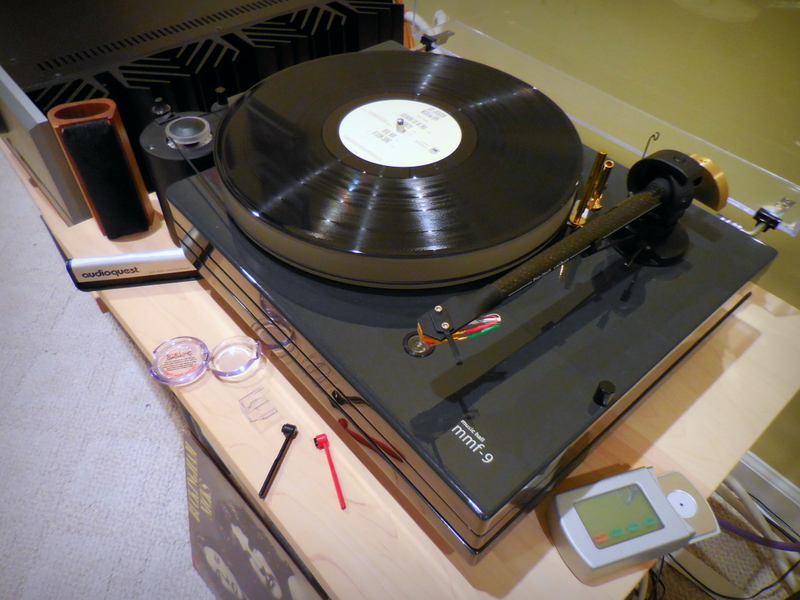
I confess, I really, really, really wanted to buy a new turntable, but my dear friend Prudence kept reminding me that was not the plan. My objective then, was to take the stock Music Hall MMF-9 turntable and make it better. I held no illusions that simple tweaks would make it the equal of a $5K turntable; but by adding a few groove-spinning niceties and a mod or two, I felt the 9 could aspire to that hallowed space between good and best; The Next Level of Better. Since my record collection is modest, I recognized spending a disproportionate amount of dough on playing LP's would be an idiotic thing to do. Therefore, with the notion of financial responsibility in mind, the first order of business was procuring a new cartridge—the $1650 dollar Lyra Delos. That's what I call fiscal restraint… Maybe I should run for President?
Undeniably, some reading this will express an opinion that mounting a Lyra Delos on my table and arm is akin to putting mascara on a muskrat. Perhaps I will never hear the full measure of the Delos' performance on the MMF-9, but I thought, why not give it a try; it's got to be a considerable, perhaps even epic, upgrade, right? I asked several experts for their opinions, and not a single one had the guts to tell me I was nucking futs to do it; so, by golly-gumdrops, I did. While Phase Three will be a more in-depth look at my experiences installing and listening to the Delos, I will say unhesitatingly, the Lyra is a killer cartridge with the MMF-9.
Take a bow, experts!

The Better Late Than Never Level
In Phase One, I green-lighted a few accessories as sensible in scope and cost, but as I began to refine a probable list of acquisitions, I decided not to replace the Ringmat 330 XL record mat that came with the MMF-9. From my limited and admittedly unscientific research, there did not seem to be the clear path of improvement I look for to merit such expenditures. Perhaps there is a new mat in my future, but for now, I'll lay old Status Quo on the platter.
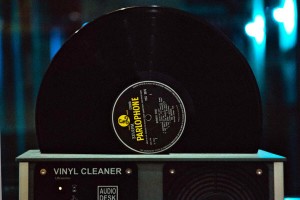
After the cartridge, a record cleaning system was my top priority. Initially I was going to buy a basic, yet reportedly effective, hand spin cleaner. Within moments of pulling the purchase lever, I had a most improbable "Aha!" moment, and went digging through the cacophony of crap in my garage, looking for a beat up box. Many years ago, a dear friend handed me this cardboard mystery chest when he moved away. I had never fully sifted its contents, but recollected something potentially special in its corrugated folds. After a speedy search and salvage mission, I pulled said carton from beneath a mound of jumble; and as the audio angels sang a wispy cover of Carly Simon's "Anticipation", I slowly opened the box to reveal a dusty Nitty Gritty 1.0 record cleaning machine…Wow! (B.B., if you are reading this, many thanks!)
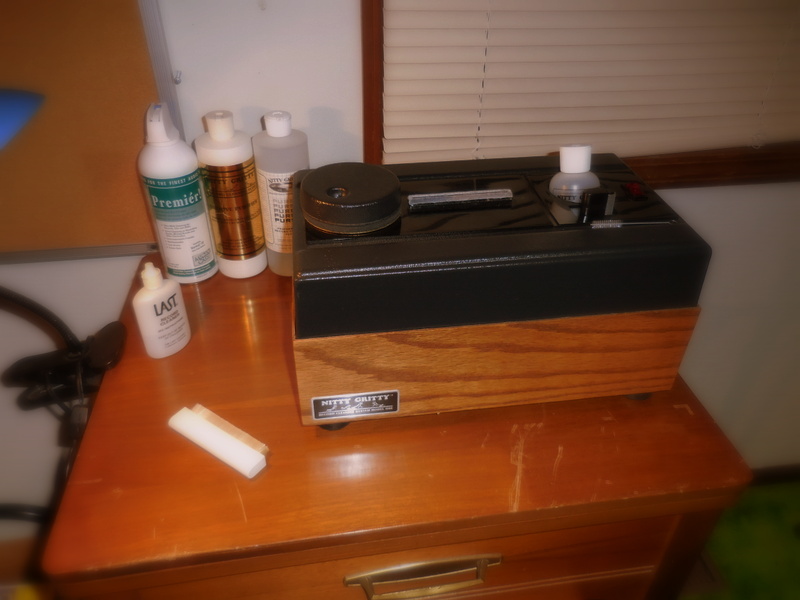
Appearing somewhat antediluvian, or perhaps Steampunk, the Nitty Gritty needed a thorough cleaning (Irony?), a new record brush, a pack of Vac-Sweeps, and a fresh bottle of Pure 2 vinyl wash. Some might say my luck doesn't suck, but as soon as I flipped the switch, the Nitty sucked the gritty right off my dirty records. Every cleaned LP sounded better, some so quiet, I swear I could hear a Unicorn fart between tracks. I now declare shame-on-me for allowing this Gritty, undiscovered gem to go unused for these many years, and for just discovering how essential it is to thoroughly scrub a dirty record. For musicphiles like me, who've spent years cleaning LPs with a judicious squirt of D4 and a Dishwasher brushing, this machine is a whole new ballgame. Do yourself a favor, invest in a good cleaning system and find out how fantastic that Harry Belafonte album you found at Goodwill really sounds!
Nitty Gritty Model 1.0 Vinyl Cleaning System
Current Retail: $485
Nitty Gritty Record Brush
Retail: $18.50
Nitty Gritty Vac-Sweep Replacement Kit
Retail $20.50
Nitty Gritty Pure 2 All-Purpose Vinyl Cleaning Fluid 16 Oz. Bottle
Retail $19.95
Nitty Gritty, Inc.
(888) 4-GRITTY (888-447-4889) USA only
4650 Arrow Hwy. #F4,
Montclair, CA 91763
Further Fantastic Upgrades (I Didn't Know I Needed)!
During the latter half of the 1970s, as the beer and music and friendship flowed, all my buddies' turntables were in constant use. It's a good thing we all had auto-return, because by the wee hours, not one of us could have rescued a needle from the runout of Led Zep. Once in a while, I still fall "asleep" during late-night listening sessions; but now I blame age and Bourbon.
Expressimo Audio has a specific model tonearm lift just for Pro-ject and Music Hall turntables. "The Original Brass Lift", designed by the late Sal Calaio, is now handcrafted by Sal's son Brian. It is a simple yet elegant, piece of solid brass industrial beauty. An online video showing Brian Calaio installing the Lift makes it look deceptively simple—and perhaps it should be—but the location and head weight must be on the money, and only then will it work to perfection. I thought I should have nailed it the first time, but pathetically, it took four or five failed attempts before I got it positioned and working correctly. It was a timely success, as I was feeling drowsy after a late night listen to Aerosmith's Toys in the Attic, caused of course, by my ripe old age (12 years in an oak barrel).
He Ain't Heavy, He's My Counterweight
In addition to The Lift, Mr. Calaio designs and manufactures turntables, tonearms, arm weights and other turntable accessories under the Expressimo banner. A new counterweight was not on my TT-radar, but after browsing his website, I casually asked about the Half Moon Heavy Weight and whether it would work with the Project Carbon 9c tonearm. Brian indicated that he could make a custom weight, and once I agreed, he couldn't do enough to help figure out what I needed. (And no, he didn't know I was a PF writer, he just really wanted to help me get better sound from my turntable.)
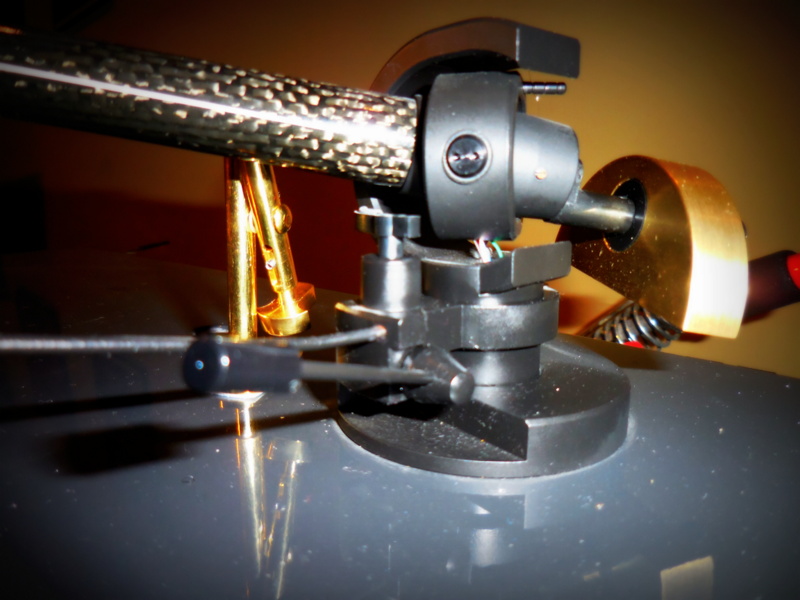
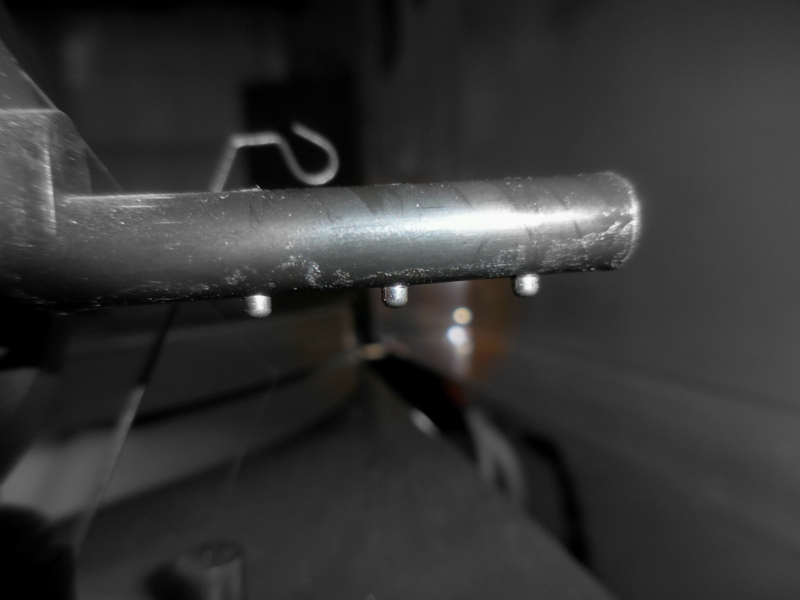
At Brian's direction, I measured the end stub of the tonearm with a micrometer and he machined the Half Moon to fit the Project arm perfectly. For MMF-9 owners who may be interested, I've done the heavy lifting, giving Brian the measurements for this specific arm, but there is one other mission you must accept and perform to use the Half Moon. There are three small metal "studs", each just a little larger than a grain of rice, that stick out of the bottom of the arm stub. These studs help guide the stock counterweight along the arm stub when the weight is rotated, but they must be removed to use the Half Moon. It is a simple operation that requires a push pin and a little courage to pop them out from the existing hole in the top. Once removed, I put them in a labeled plastic baggie. The studs can be re-installed in minutes should the stock counterweight be needed again.
It's rather amusing to me now; I didn't have a clue that a new counterweight could make such an impact to the sound of my old-tech records. I certainly didn't think I would be purchasing one, but I'm damn glad I bought the Half Moon. It adds solidity to the arm that translates into better tracking, greater clarity, tighter bass, and better tonality. It's an immediately audible, across the board improvement. Now I almost feel foolish for questioning whether it would make any difference.
High End audio is one crazy-ass hobby.
Wire Me Red, Blue, Green, and White
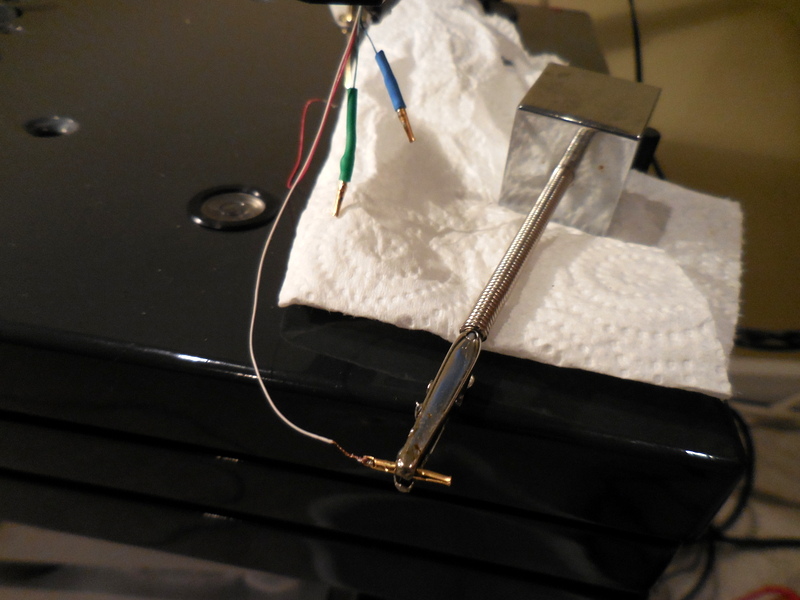
I had researched rewiring the tonearm too, but tabled the idea due to concerns I might damage it. Nevertheless, when Brian Calaio suggested his tonearm rewiring kit should also make a noteworthy difference and volunteered to give me pointers on the process, I thought, oh what the hell, and went for it! The "kit" consisted of four 18" long color-coded Cardas .33 awg copper Litz tonearm wires, along with copper Cardas cartridge clips, short lengths of appropriately colored shrink tubing and a bit of Cardas solder. With a stormy evening curtailing summer outdoor activities, I dove right in to rewiring the 9c arm. I feared the worst, but while it is a moderately tedious procedure, it only took me about 3 hours from start to playing music.
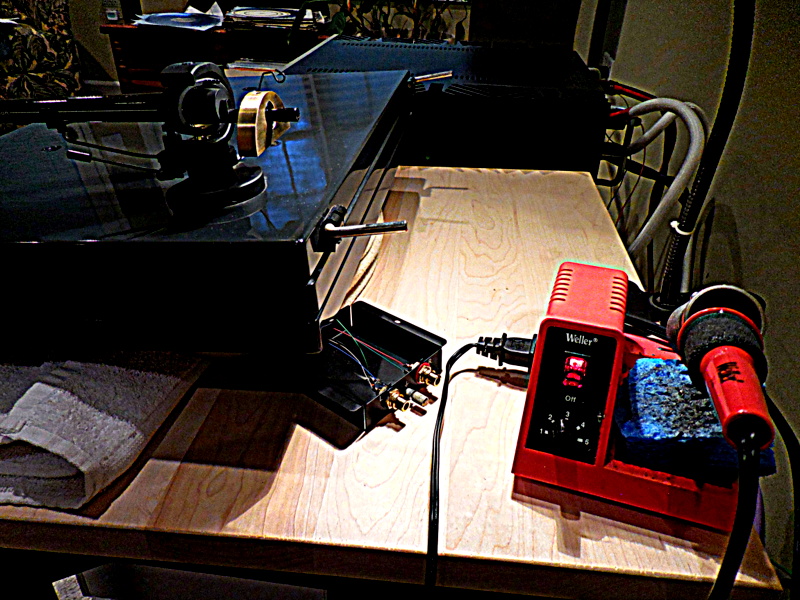
Armed with my trusty Weller soldering iron; a pair of fine wire clippers, needle nose pliers, and a few assorted soldering tools, I disconnected and removed the dust cover, motor, platter, cartridge and removed the two screws from the RCA junction box on the bottom of the MMF-9. Simple yes, but a cautionary note to those who might try this too; the existing wires are very short and very small, so moving the RCA junction box around is tricky unless the leads are cut. It is important to note that the ground connections are also in this box: One black lead from the head shell and one green (I presume) grounded to the frame inside the body of the TT. Both ground wires are soldered to a sheet metal tab on the junction box and are not to be removed from the turntable. Fair warning: Make sure you do not accidentally pull out the black ground wire or break it off at the head shell. And since all the existing wires are so short, it is possible to accidentally pull them into the arm tube before installing the new wires. Yes, I almost made this mistake.
After disassembling the TT, the next order of business was deciding whether to leave the arm in the plinth or take it off. Not confident on the best way to proceed, I decided expert assistance was necessary. A quick call to Brian Calaio prepared me with a few important do's, don'ts and what-if's. The most important suggestions were pleasantly simple. The first tip helped me determine whether to take off the arm. I was to leave the arm in place and check how easily the existing wires moved. If the wiring slid easily back and forth from bottom to head, the chance was good that I could solder the new wires to one of the old, using one of them as a pull wire. If, however, the old wires felt as though they were binding in the arm tube, it might be necessary to remove the arm and pull in a more robust lead to use as a fish wire. If all else failed, I'd have to resort to the old fish wire-with-hook trick to grab the wires at the pivot and pull them through the tube into the head shell.
Brian's second tip equally useful: Use the soldering iron to melt the insulation off of the Cardas wire. Stripping .33 AWG stranded wire is not just difficult, it is damn near impossible. Using needle nose pliers to hold the wire stopped the heat conduction at the point where the melted jacket contacted the steel of the pliers. It worked like a charm. After stripping, I tinned the ends of the Cardas Litz wire, which is quite plainly, a bitch to do. Finely stranded wires resist solder like they were taxes, and if I did it often, I would invest in a solder pot.
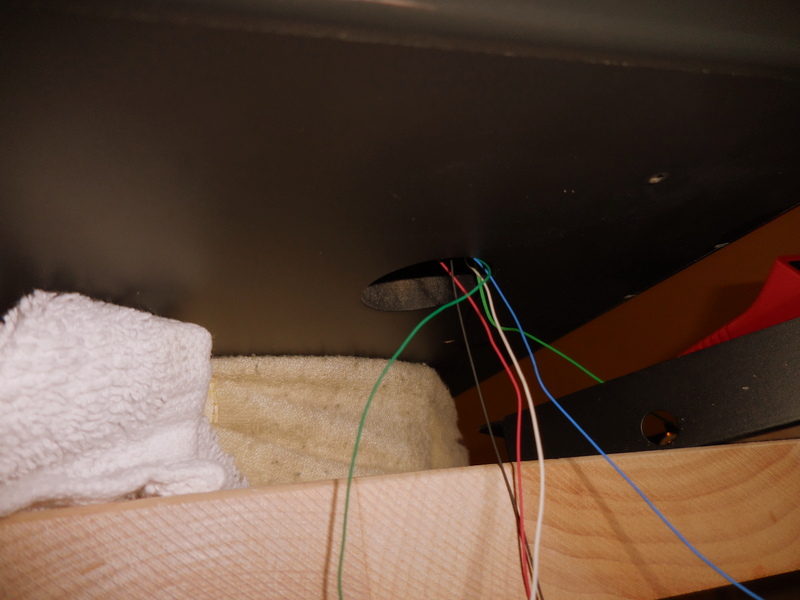
Since I made the decision to pull the new wires in from the bottom, I snipped off the existing signal wires from the RCA's, then situated the turntable so the hole on the bottom was close to the edge (but not down by the river) of the shelf, allowing for easier manipulation of the wires at both ends. I melted the insulation on the existing wire which moved the most freely and soldered the four new wires to it, being careful to keep the soldered connection small and strong. Wanting to make sure movement was as unrestricted as possible, I pulled out the other three signal wires (leaving the black ground), and began pulling—very gently—from the head shell end. The wires traveled up through the hole in the bottom of the plinth and into the base of the arm without difficulty. The sphincter-tightening moment came when the soldered wires transitioned through the gimbal pivot and into the arm tube; no rushing, I just applied gentle pressure and hoped the solder didn't break. I could feel resistance for what seemed an eternity, but it was really only an inch or so, at which point the wires popped into the arm tube and continued toward the head where they poked through without incident. Sweet success!
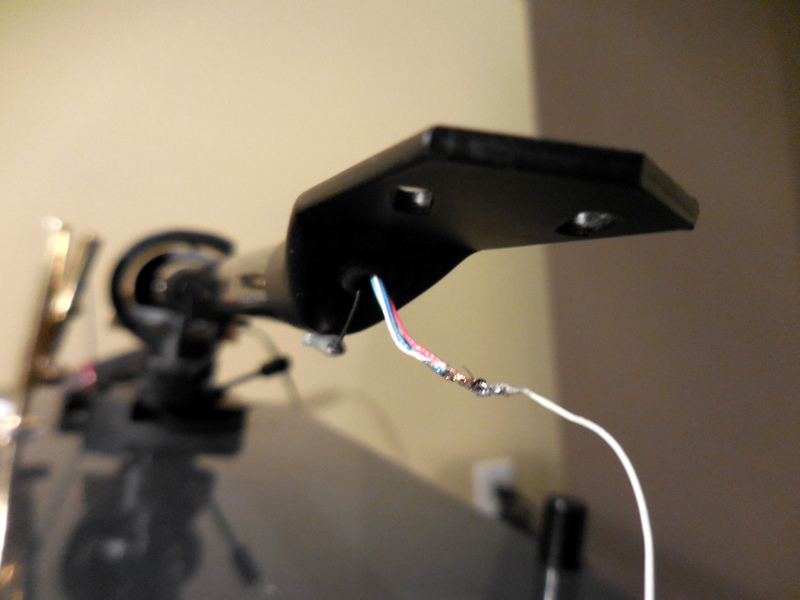
Installing the wires into the arm tube is really the job here. The remainder is tedium. I go months without touching a soldering iron, so it did take me a while to install the cartridge clips and rewire the RCA junction box. Those .33 AWG wires are not just small; they are magnifying-glass tiny. If you have zero soldering experience, I would not recommend losing your liquid-metal virginity on these pitiless connections.
In general, I'd say this project is 23% experience, 33% luck, and 33% guts. The 10% left is the "Thank you" I'll leave Brian Calaio for offering his knowledge. If you have zero DIY know-how, I'd leave this project to a professional, like Brian. I was lucky that I had no trouble, but that may not be your result, or even mine if I were to try again. To those who attempt it: Go slow, take your time, and breathe. If things aren't going well, get away from it for a bit; have a bowl of ice-cream and start again with a fresh mind. (No bourbon or coffee until this job is done!) Perhaps someday I'll replace the stock RCA's with some nice Cardas jacks and if I do, I will extend the ground wires directly to the grounding post. But that is for another day, for now, I am done.
Expressimo Audio - The Original Brass Tonearm Lift (for Project and Music Hall Turntables)
Retail $99.95
Expressimo Audio - The Half Moon Heavy Weight:
Retail $99.95
Expressimo Audio - Cardas Tonearm Rewire "Kit": I don't think Expressimo advertises this for sale, but I believe you can twist Brian's arm to put together a kit for your needs.
Retail $60.00 (Pricing may vary.)
More Tweaks I Didn't Know I Needed…
Mobile Fidelity Sound Lab Original Master Record Sleeves: These plastic/paper sleeves are great replacements for old, ripped, discolored paper sleeves—a no brainer after a good cleaning. Protect that precious vinyl!
Retail: $20 for a Package of 50
(Available direct from Mofi or from many other fine audio retailers)
www.mofi.com/product_p/omrs.htm
Music Hall - Drive Belt for MMf-7, 7.1 & MMf-9: While I was in the mood to drop coin, I purchased a replacement drive belt for the turntable. Mine was in good condition, but as soon as I put the new one on, I could hear a difference in speed control and timing. A good maintenance item to take care of once every decade.
Retail Price: $35
(Available from many fine audio retailers)
Extreme Phono Solid-State Stylus Cleaner: This semi-solid gel cleaner is effective and easy to use. Simply open the top, place on the platter, and let the stylus drop down until it touches the gel, then immediately lift it up. It works like a charm, eliminating the regular use of a stylus brush, which for me, Mr. Fumblefingers, is much less treacherous!
Retail: $29.99
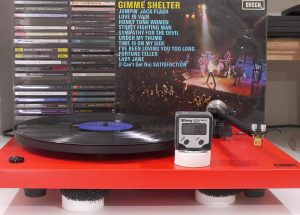
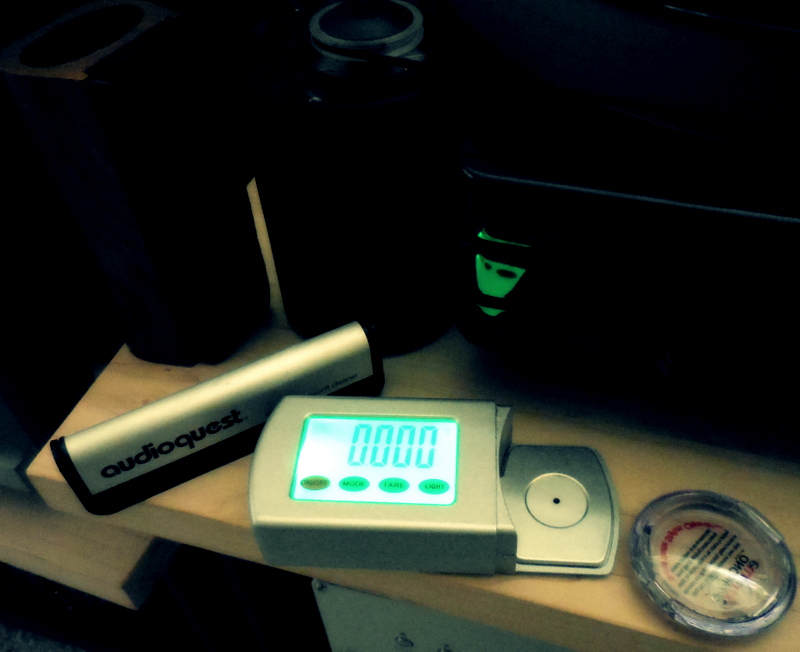
The Audio Additives Digital Stylus Force Gauge: The Lyra Delos has a very small window of "correct" Vertical Tracking Force and this inexpensive digital stylus force gauge makes quick, easy and accurate work of setting VTF. A really great tool for any serious analog junkie; ask the spouse to buy one for your birthday.
Retail: $79.99 at Music Direct
Past Performance is No Guarantee of Future Kick-Ass Sound
Phase Three—my take on setting up and listening to the Lyra Delos—will follow shortly, completing the series on upgrading my turntable. It has certainly been an eye-opening experience. I readily acknowledge that I don't have enough high-end turntable expertise to proclaim how good the MMF-9 GBE (Gary Beard Edition) table might be, but Music Hall owners take note; the changes I've made and the accessories I've added, are in sum, a huge step up in performance. Even without the Delos, the new tonearm wiring and counterweight offer immediate sonic improvements for less than a couple hundred bucks. I am not naïve enough to believe I am getting every last smidgen of ultimate goodness the Delos is capable of extracting, but dang it all, my rig is singing ever-so-sweetly and getting righteously better minute by minute. Hmmmm…I think I'll spin some Doobie Brothers.
Stay tuned for Phase Three…