|
You are reading the older HTML site Positive Feedback ISSUE july/august 2007
Room Treatments, Part 2
Your listening room, according to the experts, contributes at least half the of the sound you hear in your room. As such, your room is the most important part of your audio system. Yet it the component on which most audiophiles spend the least money. I discussed some of the reasons for this in Part I (https://positive-feedback.com/Issue21/gordon_rives.htm) of this two part article. In the first article I explained how I used acoustic engineering advice from Rives Audio and made substantial improvements to the sound of my room for less than the price of a new top end preamp. The room treatments that are described in Part I primarily affected the midrange and treble. With this article I will describe how I took a Do-It-Yourself approach to tackling the bass problems of my listening room. The problems of bass in a listening room are well known. The sound waves reflect off of the floor, walls, and ceiling and form nodes and anti-nodes. If you run a frequency response curve (Decibels versus Frequency) with the recording microphone at the sweet spot in a typical listening room you will find numerous peaks and valleys in the response curve. Think of ripples in a bathtub. If you drop an object into a bathtub full of water the ripples spread out, hit the sides, and then reflect back. Where the peaks of the reflected ripples meet other reflected peaks the height of the peaks are additive and you get a higher peak. Where the troughs of the reflected waves meet the troughs of other reflected waves the trough depths are additive and you get a deeper trough. Where a peak and a trough meet they cancel out and the water is flat.
The same thing is happening in your listening room with the sound waves and this is causing the peaks and valleys to appear in the frequency response curve of your room. Now if you want to completely eliminate this problem just take your loudspeakers outdoors. Once outside, there are no walls to reflect sound waves and the frequency response that you hear is the frequency response of your loudspeakers. Listening to your stereo outside is not an option for most people. Large concert halls also do not have the reflected wave problems of small rooms However, listening to your stereo in a concert hall usually also not an option. So for those of us that have listening rooms in our homes, what can we do to try to flatten out the frequency response curve? Digital room equalization is one option if you have an all digital system. However, even the best of the digital equalization systems are not perfect (yet). If you listen to a lot of analog sources, a digital equalization system is not an acceptable solution. Conversion for analog to digital and back to analog again is clearly audible in high end systems. So if equalization is not an option, what is? One solution would be to add room treatment materials to your room that will absorb bass frequencies at the frequencies where there are either peaks or valleys. Using properly tuned Helmholtz resonators you can target specific bands of bass frequencies and reduce the amplitude of the reflected bass sound waves at the targeted frequencies. This option has a few drawbacks. Buying Helmholtz resonators is not cheap. You can build your own, but even if you get the materials for free, you would need so many of them to reduce significant peaks it would become impractical to put that many Helmholtz resonators into your listening room. Another option is to move your loudspeakers and your listening spot to positions in the room such that the number of peaks and valleys in the frequency response at the sweet spot is minimized. While not a true solution, since it does not reduce the amplitude of the bass sound waves reflecting in the listening room, it can significantly reduce the nodes and anti-nodes at the listening position.
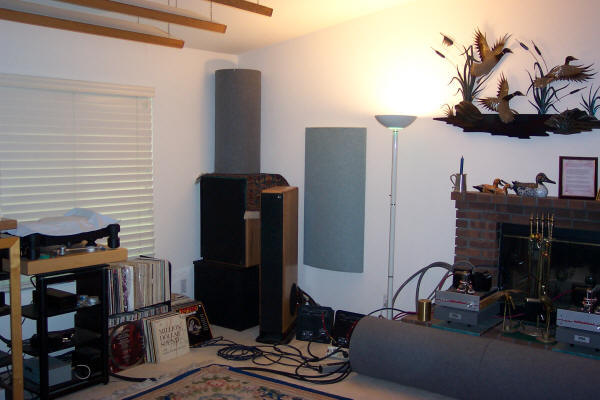
Acoustic Science Corporation (http://www.acousticsciences.com) (ASC) and Real Traps are the two leading companies that make room treatments for bass problems in small listening rooms. Both companies have a lot of useful information in articles on their websites. I read the articles as well as information on other web sites. From my reading it was clear that I needed to try different locations for my speakers (VMPS RM30M s -3dB at 37 Hz and a VMPS Larger subwoofer (-3 dB at 20 Hz). To find the best location for the speakers and subwoofer I would move them, run the 1 Hz step test tones, enter the raw data into a spreadsheet that had I created that automatically added the Radio Shack correction factors and also drew a graph of the frequency response. I tried numerous locations for the speakers and sub. Every location yielded a different frequency response curve, but I could not get one that was significantly flatter than the others. At this point I had a friend come over who had considerable experience helping people set up digital equalization for their stereo systems. Digital equalization does not solve all frequency response problems. However, usually the flatter a room response curve you start with, the flatter the curve after equalization. Thus, my friend had a lot of practical experience in finding the speaker locations that resulted in the flattest unequalized room response at the listening position. We spent one afternoon moving the speakers and sub around and then measuring. We found a better position, but it still was not satisfactory. During the following week I moved the speakers around trying what I considered to be radical positions. As it turned out, having the speakers almost touching the front wall yielded a significantly flatter room response than any other position. When my friend came back the following weekend I showed him the graphs of the new position which he agreed were better. We spent the next few hours moving the speakers by small increments until we were pretty satisfied with the response curve for the upper bass and middle bass. Next we started on the subwoofer and the low bass. After a number of moves and orientations (sub firing towards the front wall, firing towards the side wall, firing directly at the sweet spot, etc.) we decided that the sub in the left front corner firing directly into the room gave the flattest frequency response. I then suggested we move the sub up off of the floor and onto a stand that was 22 inches high. My friend was concerned that keeping the sub on the floor was the only way to minimize the floor bounce. The higher the sub driver was from the floor, the longer the distance the sound wave that bounced off of the floor to the listeners ears had to travel. Thus, the more delay in the time it took the bounced wave to reach ones ears versus the wave that arrived directly from the sub. After some discussion we lifted the 110lb sub onto the stand and took new measurements. The measurements were better with the sub lifted up than on the floor. The final step was to set the turnover frequency, gain, and the single band parametric equalizer that are built into the plate amps (class AB, not D) that drive the sub. Setting the parameters for single band equalizer didn’t take much time.
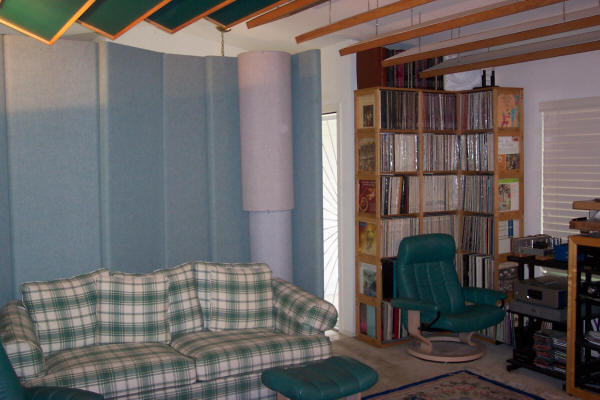
During the weeks that I was moving the speakers and sub around, I was also busy on E-bay and Audiogon buying used ASC traps. I chose ASC tube traps over the Real Trap bass room treatments because there were quite a few used ASC tube traps for sale and no used Real Traps for sale. I ended up buying four 13" x 4' super traps (super traps are tube traps with a Helmholtz resonator built in to extend the amount of low bass absorbed), one 16" x 4' tube trap, two 16" x 3' super traps, two 16' x 3' tube traps and one tower trap (tower traps are square tube traps (14.5" x 14.5" by 6.5' tall). I also bought new a sub trap since I could not find one for sale used (sub traps are super traps built as a 22" cube. The sub is placed on top of the sub trap to eliminate the boundary reinforcement that the floor provides.) As I acquired the ASC traps and placed them in my listening room I noticed an improvement in the sound when I played music. The ASC traps work by converting the constantly changing air pressures into heat. When playing the Real Trap steady test tones, air pressures stay constant. Thus, the ASC traps did not affect the measurements that I was making while moving the speakers and sub around.
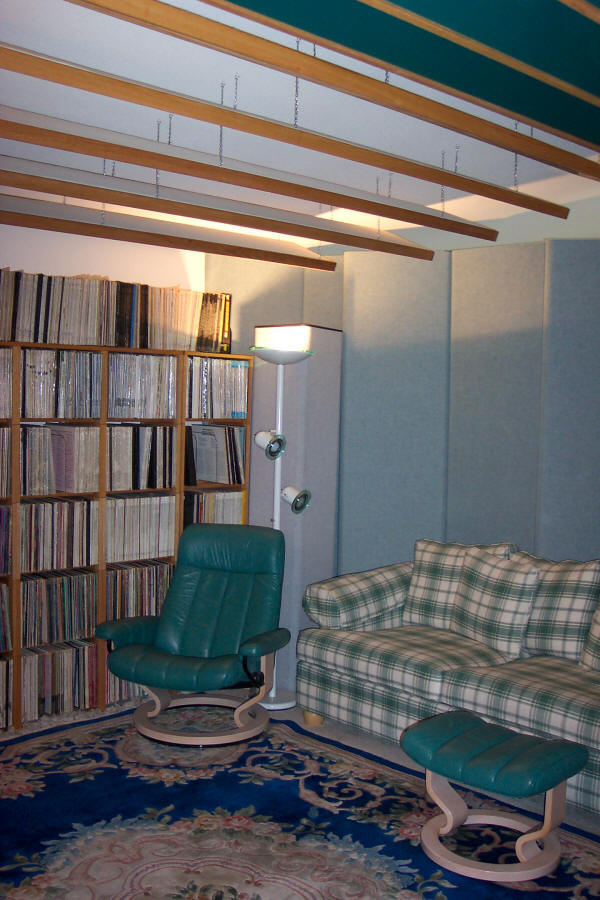
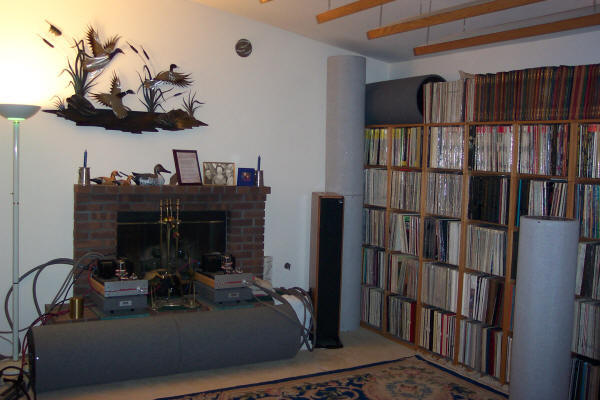
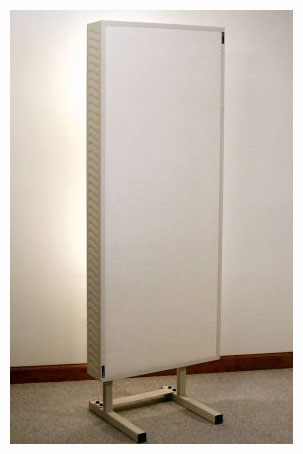
After I had placed all eleven traps into my listening room, I had two other audiophile friends come over and we spent the day moving the ASC traps around the room. Besides absorbing bass frequencies, the tube and tower traps also act as diffusors. Half of the trap exterior is covered with a membrane that reflects frequencies above 400Hz. As we moved the traps around the room we not only changed their physical position but also changed whether the diffusing side was directed at the listening spot or away from the listening spot. What we heard change as we moved the traps around was imaging, soundstaging, and midrange clarity. We had thought the two front corners of the room would be the critical location for the traps. However, the corner between the floor and the hearth turned out to be the most critical spot to place the traps. Interestingly enough, there was a noticeable difference in sound between using 13" tube traps in front of the hearth versus the 16" traps. The 16" traps added a sharpness to the imaging that was lacking with the 13". The tube traps in the left rear corner and the tower trap in the right rear corner are not placed in real corners since the RPG panels that they are up against are transparent to bass frequencies. Without corner loading they are not doing much to absorb bass. However, their diffusing qualities are important, the tower trap especially. With the two diffusing sides of the tower trap facing into the room, the sound at the listening spot is too bright. With the two diffusing sides facing away from the room, the midrange achieves a clarity that disappears if the tower trap is removed. In an asymmetrical room such as mine, there does not appear to be a scientific way to place the traps. However, by trial and error and educated guesses we were able to arrive at positions for the traps and diffusing sides that resulted in a significant improvement in midrange clarity, focus, and soundstaging.
Having finalized the positions of the speakers, sub, traps and diffusing sides, I had my friends return to just listen to music. These friends have heard my room both before and after I did the Rives Audio treatments. They were now hearing my room’s third iteration. Their comments regarding this third iteration was that moving the speakers and adding the tube traps improved the sound by as great an amount as doing the Rives Audio treatments. To their ears, the improvements were not subtle. What they heard was that the euphonic warmth in the lower midrange caused by the now absent bass hump was gone. They also noticed a clarity to the sound that had not existed before. Without having computer software to generate before and after waterfall plots of the frequency response of my room I can not prove it, but I believe the traps are reducing the duration of the ringing of the bass room nodes. Shorter duration / more rapid decay of the bass frequencies means that the bass no longer intrudes as much into the lower midrange. This is perceived as additional clarity. My friends also commented on increased imaging and a wider, deeper, more clearly delineated soundstage. Imaging and soundstaging are the attributes that changed the most as we rotated the tube trap diffusers so that they faced towards or way from the listening spot. Between the Rives Audio treatments and the ASC traps I have a little more than $7000 invested in room treatments. While that is still a lot of money, the improvements that have been made to all aspects of the sound of my system are immense. Spending $7000 more for amps or for a preamp would not have yielded a tenth of the improvement in sound that these combined room treatments have wrought. Room treatments - The Final Frontier. Before you buy your next piece of equipment, treat your room. You won’t regret it.
|

 After writing Part I of this article I
knew that there were problems in the bass in my listening room. Since every small room has these problems, and the smaller the room
the more problems, I knew that I must have them too. I initially
started by measuring the room response with pink noise and a Photon
PAA2. The PAA2 is a small hand held device that measures the room
frequency response in 1/3rd octaves and displays the results
graphically. The PAA2 showed that I had a bass hump at around 30 Hz
and that the treble started rolling off at 16k Hz. Not too bad I
thought. However, I remember reading something on the RealTraps
website
After writing Part I of this article I
knew that there were problems in the bass in my listening room. Since every small room has these problems, and the smaller the room
the more problems, I knew that I must have them too. I initially
started by measuring the room response with pink noise and a Photon
PAA2. The PAA2 is a small hand held device that measures the room
frequency response in 1/3rd octaves and displays the results
graphically. The PAA2 showed that I had a bass hump at around 30 Hz
and that the treble started rolling off at 16k Hz. Not too bad I
thought. However, I remember reading something on the RealTraps
website